Rendezvous Point Hinesburg – North East Group (Blue)

We put out the call for local information on resupply stations and rendezvous points, and the Zombie Survival Crew continues to respond. Information is coming in and we’re sifting through and compiling everything for communication to the loyalists. We started with information on South Central Resupply site Midland, TX thanks to Purple Brigade member, Kris O’Dell, continued with Wilmington, DE compliments of ZSC Yellow Brigade member Brian McCabe, and Blue Brigade member Jenni Womick brought us Trinity, and we now move forward with Sergeant at Arms, Sarah Quattrocci. Deep in the mountains of Vermont, she has located the perfect meeting place for the Blue Zone.

_______________________________________

Assuming that higher-population areas are high-risk, finding a location off the grid but not completely inaccessible is key. Just outside of Burlington, VT and easily accessible from both Northern and Southern areas West of the mountains via Route 116, this location is a safe distance from the more heavily populated areas.  Located on Route 116 just north of Hinesburg village on the east side of the road.

Access from New York state can be made by crossing the Crown Point Bridge and following Route 17 to connect with Route 116 at the Junction in New Haven, VT.


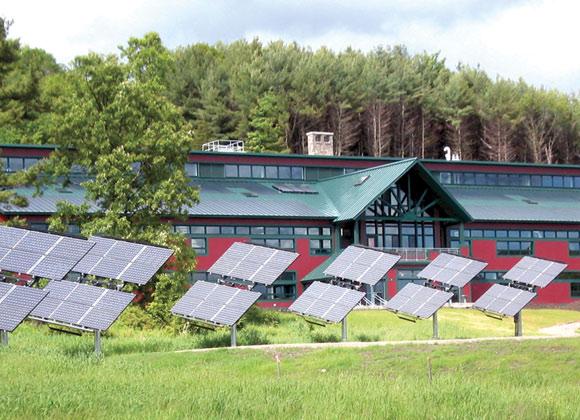
This building is not only spacious and designed for the long haul, but also combines security with at least some of the comforts of home. The building is powered primarily by a photovoltaic system (solar power), a 10-kilowatt wind turbine and uses another renewable resource such as wood pellets made from lumber milling waste for heating.

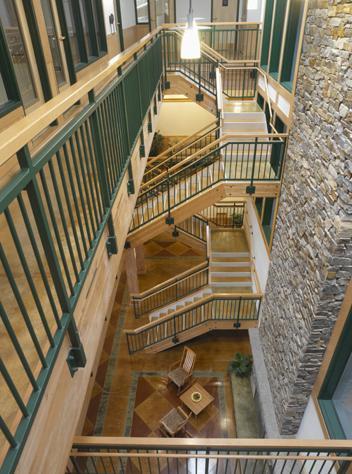
The core of the building features a large, open-concept common area constructed of concrete, wood, natural stone and other natural materials. It includes a 3-story stone fireplace to help keep the entire area heated during the colder months. There are dozens of skylights and operable windows to take advantage of natural light, provide natural ventilation and fresh air and allow full views of the outside.

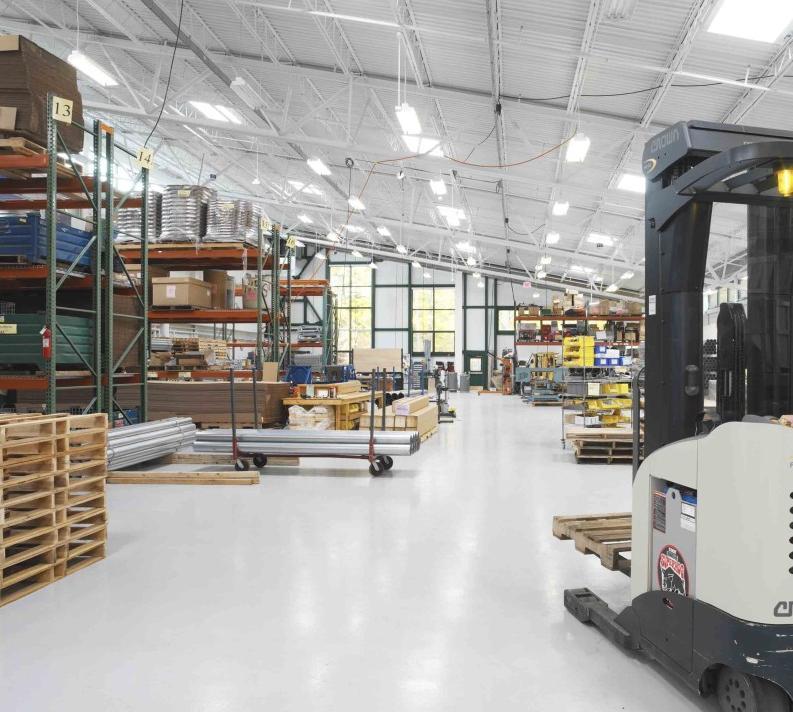
Situated within walking distance is a grocery store, hardware store, gas station, doctor’s office, police station and – perhaps most importantly – a large secure warehouse that is ideal for storage of supplies.

To read more on all resupply stations, please go to our (for members only) Key Links under the Escape Routes/Resupply Stations section!


Survival School – Cooking with Fire

A while back we covered the basics of building a campfire to keep yourself warm if you should find yourself forced to find sanctuary in the woods during the Zombiepocalypse. A campfire is good for more than just warmth. You’ll need it to purify water, cook food, and help clean your laundry and dishes. Heck, it’ll even make for a handy weapon if your camp is ever invaded. Basically, fire is your new buddy the second you find yourself able to set up camp. But make sure the zombies are all dead before you start building your campfire.

(Related: Survival School – Fire Safety.)

Building a fire for the purpose of cooking takes a few extra steps from what we covered in our Fire Safety basics.

  1. Make sure all wood and kindling is dry. Wet wood burns poorly, doesn’t create ideal coals for cooking, and emits unhealthy amounts of smoke.
  2. Build a U-shaped rock border around the fire pit area. The rocks will help hold up the grill, if you have one. The open end of the pit will allow you to spread out the coals to control cooking temperatures.
  3. Fill the entire fire pit with a layer of crumpled paper (or any other starter). Lay kindling over the starter in rows, and another layer of kindling on top of that in rows going the other direction. Do not build a tee pee type fire. You’re creating a bed of coals to cook on. Tee pee fires don’t burn uniformly and won’t create the proper coals.
  4. Light the starter.
  5. As the kindling catches and begins to burn, add 2-3 medium sized pieces of food of uniform shape.
  6. Allow the fire to burn down to coals—approximately 1 hour.
  7. Rearrange the coals with a shovel, creating a ramp with the thickest layer of coals in the back, the thinnest in the front of the pit. You’ve just created a High-Medium-Low setting for your fire pit. High in the back, Low in the front.
  8. Place your grill using the rocks to hold it off the coals.

    Cooking Tips:

    Foil is Awesome –

    Hearty vegetables like corn, potatoes, carrots, turnips; can be washed, wrapped in foil, and set directly onto the coals to cook. Flip them occasionally with tongs to get uniform cooking.

    All-in-one meals are a breeze with foil. Cut vegetables into bite-sized pieces. Keep meats a little larger to ensure they have the same cooking time. Wrap everything securely in foil with spices, olive oil, and a little water, wine or lemon juice. Set the foil package on the coals and let it cook. No clean up after. Eat it straight from the foil after it’s cooled.

    Non-poisonous leaves can be used instead of foil. Make sure you research plants in your area before being forced to live outdoors because of zombie attack, this way you are well aware of indigenous plants your family can eat and use for survival.

    Anything can be a Cooking Pan –

    A lot of foods will be canned toward the end. Canned foods are shelf stable, durable, and last a long time. However, they’re not good eats cold. Pop the lid on the can, remove the label, and set the can at the open end of the fire pit. Drag a few coals around to surround the bottom for even heating. Stir every couple minutes. When the food is heated, pull the can using tongs or a pot holder. Super easy. If you wash the can, it can be reused to purify drinking water for your morning coffee.

    Even a paper cup can be used to boil water. This takes a little practice, but since paper has a higher ignition temperature than water’s boiling point, in theory you can use a plain Dixie cup to purify water. Set the full cup near the open end of the coals, but not touching. It’ll take a little while, but if your coals are hot, the water will boil.

    Hard squashes, such as butternut squash, pumpkin, spaghetti squash, etc. don’t need a pan to cook them. They don’t even need foil. Set the squash on the low end of the coals and roll it occasionally for uniform cooking. Once the flesh is tender (when stabbed with a knife, there’s no resistance), pull it from the heat. Pumpkin in particular is great roasted over a fire. Break it into chunks and cover with butter, brown sugar, and cinnamon. Eat everything down to the pumpkin skin—the skin will be charred from the fire, but the inside is delicious.

    Cruddy Cookware is Okay –

    Cooking on fire is hard on pots and pans. When packing cooking gear, Do Not use nonstick pans. Open fire burns too hot and will scorch the nonstick coating, releasing potentially harmful chemicals. Go for cast iron or cheap pans without nonstick coating. A good Dutch oven with the lid will let you not only make delicious stews, but bake cakes and other goodies as well right over your campfire.

    Put your new knowledge to use and check out one of the offered up by your ZSC commanders.