Sweat or death? The answer should be easy. Unfortunately, the vast majority of people are “too busy,” “don’t have enough time,” “don’t know what to do,” or simply don’t want to put the effort into getting into shape. Getting over the mental barrier keeping you from working out is possibly the most difficult part. We’re here with a nice, simple mantra to get brigadiers out of their office chairs and into a healthy exercise routine. Are you ready for it? Here goes . . . .
Get in shape or get eaten.
Told you guys it was simple.
Yes, it seems silly. Everyone knows zombies, if they ever do exist, will probably be slow and clumsy. But there may be a lot of them. In large numbers, it’ll be easier for them to corner someone who’s out of breath from running less than a block. Not to mention, there is always the unsavory reality that the humans in the zombie apocalypse pose the true danger—we don’t want anyone winding up like the poor souls in the cages at Terminus during the season 4 finale of “The Walking Dead.” Staying one step ahead of an intelligent threat requires more than a few sit-ups once a month. Survival also means more than defeating anyone seeking to harm you. Gathering food, water, firewood, and building a secure base camp will require more strength than most people possess without at least a little training.
Disclaimer: This article is intended to provide basic guidelines and motivation to get you started on a healthy workout path. If you have health issues, please consult a doctor before beginning any exercise routines.
The CDC—using the 2008 Physical Activity Guidelines for Americans—recommends adults between the ages of 18 to 64 do medium-intensity aerobic exercise for a minimum of 150 minutes per week, or half as much high-intensity aerobic exercise (75 minutes). Plus, 2 days of muscle strengthening activities per week on top of the aerobic exercise.
The main goal of aerobic exercise is to raise your heart rate for longer than 10 minutes at a time throughout the day. That’s a handful of laps in the pool. A couple miles on a stationary or standard bike. A brisk mile walk around your neighborhood. Heck, even a quick 3-song dance break in your closed office or an afternoon of gardening. For more ideas, here’s the CDC’s guide for measuring physical activity intensity.
Muscle strengthening activities are pretty self-explanatory. Biceps and shoulder muscles—which you need to cut down firewood and the undead—won’t build themselves while you watch just one more episode of your favorite show (do like we do, watch TV while working out). Strong abdominal and back muscles can cut down on back problems that’d put you out of commission, unable to find food on your own.
2 days a week, after your aerobic exercise is done, work your muscles head to toe. This can be done with weight lifting, resistance band exercises (good for those rebuilding muscle after injury), yoga, or body weight exercises—planks, the Superman exercise, push-ups, crunches, etc. It’s okay to alternate days to focus mainly on arms or legs, but work every muscle every time. There’s numerous resources on the internet to find exercises that’ll work best for your body. Take the time to create a routine and once you’re comfortable, begin to adapt it to up the reps and weight, or work new muscle groups.
Don’t forget to breathe! Muscles need oxygen. Holding your breath to push through one last rep will only starve your muscles.
Lastly, wrap up every exercise break with stretching. It’ll ease some post-workout soreness and ensure you remain flexible, able to move quickly and dodge those pesky zombies.
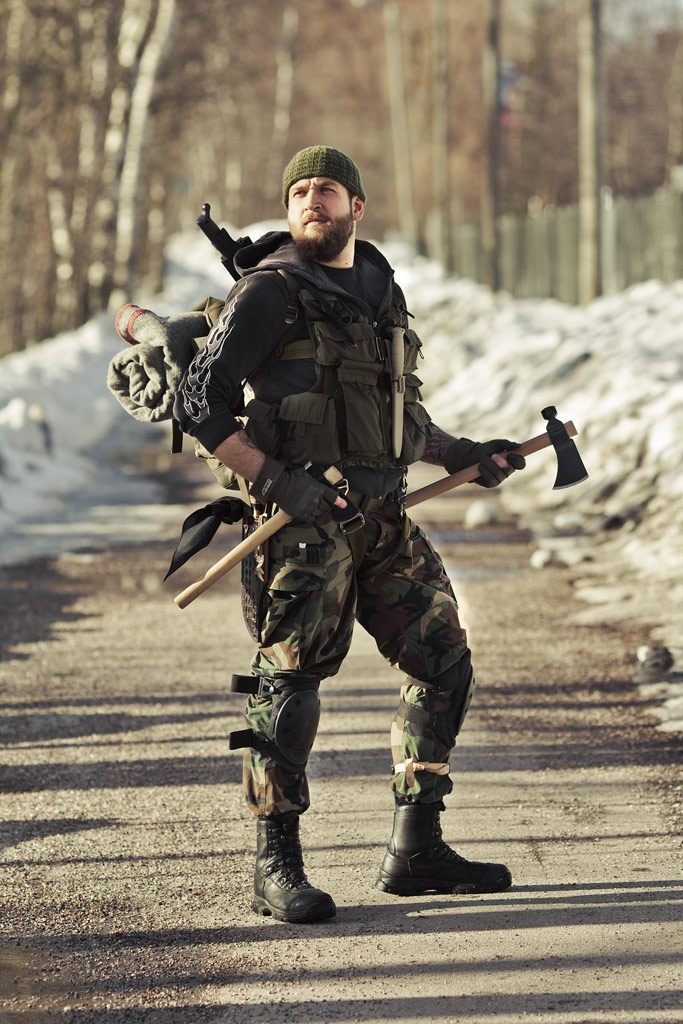
Packing for the zombie apocalypse isn’t like packing for a week-long trip to Disneyland. Trust me, I have loads of experience with the latter. The former? Not-so-much. Early in the Zombie Survival Crew’s creation, each of the commanders drafted a basic packing list for their go-bags—the pre-packed backpack or duffel bag we’d snag on our way out the door. Then, as with most others providing similar survival advice, the focus was on items needed to survive outside of one’s home for roughly a week. While first aid kits, food, and water purification tablets are well and good, none of us would have a good time trekking through the wilderness with zombies on our tails without a stitch of clothing on.
Personally, I’d rather walk barefoot across broken pine cones. Which may happen to anyone who hasn’t set aside the proper clothing.
The best way to determine what you’ll need is to know what the weather is like around the areas your escape routes will take you through. Sure, a backpack will only fit so much, but there are a few key items that can be layered or stripped down to adapt to the elements.
Here’s a few basics:
Straight-legged denim jeans – Not necessarily fashionable, but highly adaptable. They can be worn tucked into tall socks or boots to keep creepy-crawlies off your legs. Or if the weather turns up the thermostat, rolled up to the knee. Thick denim will protect from thorns, rocks, and anything else that can scrape/cut you during a hike.
A basic cotton t-shirt – Again, we’re going for function, not style. Cotton is durable, wicks away sweat, and can retain a moderate amount of heat when used in layers. Pack extra t-shirts to use as emergency bandages, washing rags, water strainer, and to layer with in case the temperature drops. Yes, they leave your arms bare, but focus for layering should be on the torso where vital organs are. Gotta keep them toasty and in working order.
A hoodie – Preferably a pull-over, since a zippered hoodie leaves a line for cold air to get in right down the center of your torso. Go for a good-quality hoodie in a dark color. Dark because it’ll absorb heat better, allowing you to bask in the sun like a lizard and warm up. Better yet, a hoodie can be tied around your waist, saving room in your go-bag.
A beanie – Along with keeping your torso warm in the cold, keep your head covered. A nice heavy-knit beanie will keep your brain from freezing inside your skull. We’re not making zombie ice cream, guys.
Socks – Lots of socks. The thicker on the bottom, the better. Your feet need extra cushioning on rocky, uneven terrain. And be prepared to change socks a couple times a day. Fresh socks are better than a massage break for re-energizing your barking dogs. There’s no spa trips when the undead are creeping closer. (Pro tip: Wash your socks and safety pin them to your backpack to dry while you walk.)
Underwear – Need we go over this one? Not only will undies keep your jeans cleaner longer, but they’ll keep dirt and who knows what else off your private parts. Showers are a luxury in the apocalypse. Don’t want to get an infection down there when all the doctors were eaten for breakfast.
Boots – A good pair of sturdy combat, EMT, or hiking boots will get you much further than sneakers. Don’t even think about packing flip-flops. Make sure your emergency boots are broken in and pack them alongside your go-bag with a pair of socks inside—just in case you don’t have time to change before you run. (Pro tip: Buy a half-size larger and put a pair of high-impact work insoles in your boots. It’ll double the hours you’re able to be on your feet.)
Heavy jacket – This may be considered a luxury item. But if you live in a climate known for being ridiculously cold, make sure there’s a coat strapped onto your go-bag. Roll it up in your bedroll. Lash it to the side with para-cord. Don’t care how you pack it, so long as it makes the trip out the door with you. Leather is ideal. It absorbs heat from the sun and a fire. Plus, it traps heat inside, much like our own skin. A thick wool coat would work, as well.
One or two changes of clothes will get you by for a while. However, the wear and tear of life on the run won’t be kind to them. Stow a small sewing kit in your go-bag with ample amounts of safety pins. In the age of YouTube, there’s no reason to not look up a quick how-to video and learn a few sewing basics. You’ll love yourself even more when you can fix that hole in your last pair of jeans instead of braving a zombie-infested store to chance finding a new pair in your size.
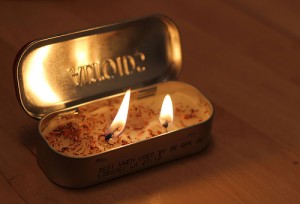
When you’re engaged in the tricky business of survival, there may be times when building a fire simply isn’t possible. Could be a lack of wood to burn, or fear of attracting unwanted attention from the undead. Either way, humans are not built to see in the dark and batteries will only get you so far after you’ve abandoned your homes in search for a safe haven. Candles are an ideal way to light your way in the dark. They aren’t too hard to make, either. Homemade candles allow you to create something that’ll fit perfectly in your go bags without sacrificing room for your Oreos and beef jerky.
Below, we’ve included instructions for a basic candle. Be extremely cautious when handling hot wax. Use utensils and pots you don’t care about (we suggest snagging cheap items from a discount store). Wax doesn’t clean off easily.
What You’ll Need:
Soy wax flakes or a block of beeswax
Wick (make sure they’re longer than your container.)
Containers (can be just about anything that won’t melt with the hot wax – mason jars, Altoid tins, old glass/porcelain cups, etc.)
Pitcher with spout or a funnel
Fragrance oil (10-15 drops per 5.5 ounces of wax) Use cinnamon, eucalyptus, or citronella to keep biting bugs away. (Note: this does not include zombies.)
Popsicle sticks (with a hole in the middle), chopsticks, pencil–something to hold the wick straight.
How to Make a Candle:
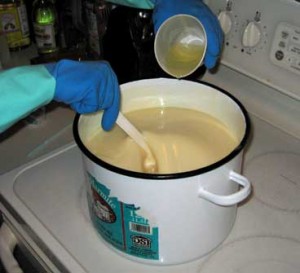
Melt soy wax flakes or beeswax in a double boiler.
Once the wax completely melted, set your pot aside to cool for a little bit.
Add essential oils.
Dip metal wick base in wax and set into the container. The wax will “glue” the base in place.
Carefully pour wax into containers with funnel or transfer wax to a pitcher and pour.
Thread wick with Popsicle stick or tie around pencil/chopstick, and let the candle cool for a few hours until solid.
Once the wax is completely set, trim wicks, leaving about ¼ of an inch above the wax.
Ta-da! Simple and easy. If you add the right essential oils, these candles will be another line of defense against bugs and the boogeyman.
Earlier this year, we reminded ZSC brigadiers that Soap is Your Friend when surviving in the zombie apocalypse, or after any cataclysmic event forcing people from their homes. As a follow-up, we scoured the internet for a handful of useful recipes, should brigadiers need to make their own soap, shampoo, laundry detergent, etc.
Please note:Making lye-based soaps can be dangerous.
Follow the safety directions on the sites linked below carefully. They know what they’re doing, which is why we’ve “outsourced” to provide you all with this handy skill.
Keeping a well-stocked survival kit isn’t always a possibility given how expensive certain necessary elements can be. For instance, tents and other portable shelters. Sure, you can find cheap tents that’ll do the job, but will they be big enough? Can you carry them and all of your gear? From personal experience, toting around camping gear for one person to last one weekend—with access to food, so no ice chest—is an ordeal. When you’re running from zombies, you’re not going to be able to carry everything and a bulky tent bag. And what happens if your tent is damaged or you’re forced to abandon it during an attack? Below, we’ve listed a few ways you can minimize your packing list and still find cover in a pinch. These are all improvised shelters which take time to set up. Do not put off setting up your camp site until sundown if you plan to use these methods.
Tarp designs:
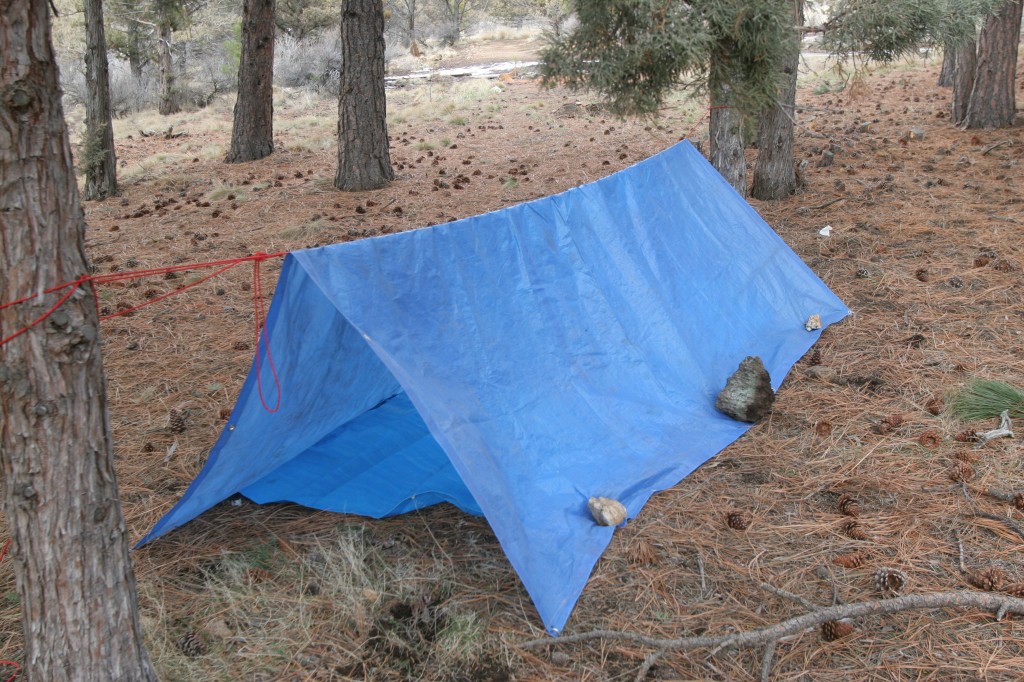
Between two trees – You’ll need: Rope, stakes (or heavy rocks to hold top tarp in place), 2 large tarps. Optional: 3-inch diameter stick long enough to reach between the trees. How to: String the rope between trees about 3 feet from the ground (or brace the branch in natural Ys formed by the trees). Stake down one edge of the tarp. Drape the tarp over the rope/branch. Stake down the opposite side of the tarp. Fold remaining tarp and lay it on the ground under the first. Good for: Getting out of the rain. This design will retain minimal heat, since both ends are open to the wind.
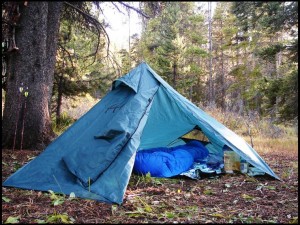
Hanging tepee style – You’ll need: Rope or para-cord, 2 large tarps, rocks or stakes. How to: Find a tree with a branch about 6 feet from the ground. Fold first tarp so you can tie a rope around one edge. Toss the rope over chosen branch and pull until the tarp is almost all the way off the ground, leaving enough slack to secure with stakes or rocks. Tie remaining rope around tree trunk. Pin down the bottom edge of the tarp in a circle, leaving a “door” where the sides meet. Fold remaining tarp and lay on the ground inside the “tepee”. Good for: Blocking wind, keeping somewhat dry, privacy.
Blanket time – You’ll need: 1 tarp. How to: In a pinch, drape yourself in the tarp, don’t cover your face, and curl up for the night. It won’t be comfortable, but will retain heat and keep you somewhat dry.
Using what Nature gave us:
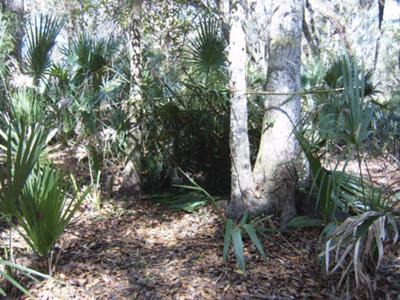
Between a rock and a leafy place- You’ll need: a large boulder, numerous long tree branches, leaves, moss, and leafy branches. How to: Lean the long branches against the boulder (remember: there should be enough space between the branches and rock for you to crawl through) in a row roughly 6 feet long. Cover the long branches with smaller, leafy branches. Cover those with moss and loose dry leaves. You want to cover as much as possible (until no light shines through the inside of the shelter) to retain some heat and provide a barrier from wet weather. A layer of dry leaves inside the lean-to will keep ground moisture and cold from seeping into your sleeping bag or clothes while you rest. A variation of this lean-to can be made by creating a 3-pole brace to lean the long branches against before covering them—two upright, one across the top.
Natural crawlspaces – Keep an eye out for rock formations, fallen trees, etc which provide natural cover, or enough cover you can pile up leafy branches and leaves on top to increase the cover available. Check for animals, first!
The internet is chalk-full of information to help us survive after any cataclysmic event—natural and manmade. You can lose yourself for days trying to gather everything by yourself. We’ve done some of the work for you, brave brigadiers. Below you’ll find a handful of advice we found online to help you once the zombies rise and force us to abandon our homes.
Light Sources
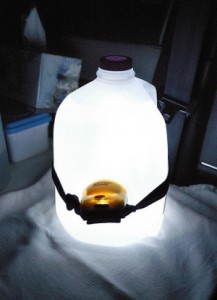
Fill a gallon jug with water. Strap a headlamp or flashlight onto the jug, with the light facing inward. This will illuminate a small space, like a tent, with soft light. No glares and no bright beams which could attract predators to your camp.
Fill a clear soda/water bottle with half water and half bleach. Set the bottle into the roof of any shack or improvised shelter with a sturdy roof. The mixture will reflect sunlight, creating approximately the same wattage as a 55-watt light bulb. Note: This is a daytime-only solution.
Crayons! We haven’t personally tested this trick yet, but if you need a quick emergency light source, light a crayon. It should provide the same amount of light as a small candle for about 30 minutes. Note: Not ideal for handling, the wax will drip. Make sure you have a sturdy, clutter-free spot to set the lit crayon.
Fire Starters
There are a lot of options for homemade fire starters. We chose two that required very little work and used items which would normally just be thrown away. For both, set them with the kindling at the base of your fire and carefully light the edge.
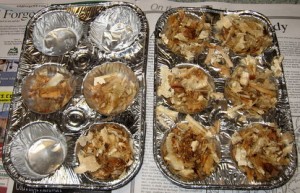
Muffin Fire Starter
Needed:
Muffin Tin
Paper muffin wrappers
Dryer lint
Melted wax (crayons work!)
Set the paper muffin wrappers in the muffin tin. Fill the bottom of each wrapper with a wad of dryer lint. Pour the wax over the lint, leaving about a quarter of an inch of room at the top so you have a place to light the fire starter. Allow to cool thoroughly before packing.
An alternative method utilizes an empty cardboard egg carton. Put in the lint and wax as described above. When the wax has set, cut the egg carton apart.
Tube Fire Starters
Needed:
Cardboard toilet paper tubes
Dryer lint
Newspaper
String (optional)
Pack dryer lint tightly into the toilet paper tube. Wrap the filled tubes with newspaper. Tuck the ends of the newspaper into the tube, or tie off the ends with string—either way works, so long as you trap the lint so it doesn’t fall out in your go bag.
Containing the little things
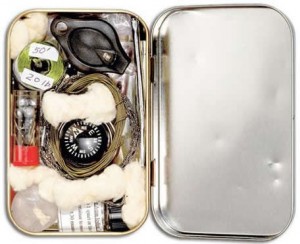
Don’t throw out those Altoids (or similarly-sized) tins! They’re incredibly helpful when packing your go bag. Here’s some ideas:
Sewing kit –Pack with sewing needles, straight pins, safety pins, tiny spools of common-colored thread, buttons, small scissors, seam ripper, and anything else you need to mend or make your own clothing.
Fire lighting kit – Pack with matches, a lighter, flint, and a small wad of dryer lint or some other easy-to-light material. Affix a piece of sandpaper to the inside of the tin’s lid to light the matches.
Individual first aid kit – Pack with bandages, alcohol wipes, tweezers, packets of antibiotic ointment, Tylenol, aspirin, Benadryl, other personal medications. Note: Ladies, don’t forget to pack a separate container (a coffee can or plastic baby wipe box) with feminine hygiene items.
Jewelry box – Keep your sentimental jewelry items safe. Wearing a wedding ring while on the run could lead to problems. Any blow to the hand could cause your fingers to swell.
Gaming kit – Pack with a pack of cards, dice, Yahtzee scorecards, a small pencil, and any other small game items you can think of to entertain yourself.
Soap holder –Soap will be at a premium during the Z-poc. Don’t waste it! Store your used soap in a tin to keep it clean.
Don’t Leave Home Without it
Pill organizers aren’t just for keeping track of your weekly medication needs. Grab a couple extras to add to your go bag.
Spice rack –Cooking in the wild will likely lend to a lot of bland, boring meals. But not if you take along a miniature spice rack packed with your favorites. Be sure to label each compartment. You wouldn’t want to confuse paprika with cayenne pepper.
Seeds – Who knows how long we’ll have to fend for ourselves without the aid of grocery stores or farmer’s markets? Pack some easy-to-grow vegetable and fruit seeds in your go bag. Once you find a place to settle down for a little while, plant a small garden. Check your area for what produce items grow the fastest and easiest.
Old t-shirts
When you pack your kitchen supplies, toss in a few old or over-sized t-shirts. They have many possible uses, a few of which we’ve included below:
Rags – Cut the shirts into smaller pieces to use for wash cloths, dish washing cloths, and clean-up rags.
Bandages – Cut shirts into long strips, about 2-3 inches wide. Boil them in water, with a tablespoon (or more, depending on the quality of the water) of bleach and hang to dry somewhere they won’t get dirty. Makes great compression bandages to slow bleeding. Also can be used as a wrap to brace sprained joints.
Small hanging bags – With a minimal amount of sewing, which can be done by hand, you can turn a t-shirt into a bag.
Needed:
A large t-shirt
Scissors
Needle and thread
Straight pins
Felt or permanent marker
Lay the shirt out on a flat surface. Using the side of the shirt as the bottom edge of the bag-to-be, trace out the shape of a purse, with a handle on the top. Pin both sides of the t-shirt together with straight pins. Cut out the bag, leaving the bottom of the bag intact (don’t cut down the side of the shirt, it provide a solid bottom for your bag). Stitch the sides of the bag closed. Leave the top open. Cut out D-shapes to create the handles. Note: if you wish to use the bag to store fruits or vegetables, or to use as a hanging sack to dry dishes, cut tiny holes in the solid sides of the bag—not too many, just enough to allow airflow.
There’s a lot of chest-thumping and bravado that goes into preparing for the Zombiepocalypse. Even your brave Zombie Survival Crew commanders are not immune to a certain amount of arrogance about the skills we’ve added to our lives in order to defeat the undead masses. However, an ounce of humility will go further to keep you alive when faced with the end of days than a well-sharpened knife.
Know Your Physical Limits
Humans are flawed creations. Eventually portions of our bodies just stop working properly. Even a healthy eighteen year old male could have a blown out knee, which won’t allow him to run when cornered by a herd of zombies. Not everyone is going to have the upper body strength to operate a bow and arrow with the precision necessary to kill a dust bunny, let alone food for your camp.
Divide and conquer. Have an open and honest conversation with your family and those in your camp, laying out any physical limitations each of you may have. If someone can’t lift more than thirty pounds, obviously they aren’t an ideal person to send off to fetch water. The guy with the bum knee isn’t going to make a good lookout if he can’t run back to camp and warn everyone. Everyone will be able to find a chore/duty in camp which plays to their strengths without crushing their hopes of survival because of a physical ailment.
Likewise, if you require medications for serious conditions, keep extras in your go bag. Every so often, refresh your supply—just in case. While on the run is not the time to find out your inhaler expired and is as useful to help you breathe as a mouthful of dirt. If you need a walker or a cane to get around, keep your spare next to the rest of your survival gear. The same idea goes for glasses, contacts, ankle/knee braces. Prone to sprained ankles? Pack extra Ace bandages in your gear. Clumsy? Make sure your First Aid kit is well-stocked with bandages, antibiotic ointment, and peroxide.
The stress of the zombie outbreak will only accentuate any limitations we have in the comfort of our homes. Just because some zombies are walking around, doesn’t mean we’ll all be transformed into Super Zombie Slayers. Life just doesn’t happen that way. It’s better to accept it now and plan accordingly. The alternative is stepping in to a situation you can’t physically fight your way out of.
Know Your Mental Limits
If The Walking Dead is any indicator, the character flaws we try to bury in our everyday lives will jump to the surface and do a little dance for attention. Personally, this is not a thrilling idea. However, just like our physical limitations, we need to prepare ourselves mentally for what could happen come Z-day.
Mental illnesses which you control with medication need to be planned for. As said previously, pack spare medications in your go bag, rotating out the supplies to make sure everything is within the expiration dates. You may also want to speak with your doctor for certain conditions to see if there are any natural remedies you may use in case of zombies. Though, if you’re going to your therapist and talking about zombies, it may cause a whole new set of problems on the mental health front. We’re just trying to cover all the bases on the off-chance something happens. Nothing that should overly concern mental health professionals.
Be honest with yourself. If you cannot cope with accidentally stepping on a snail, there is a seriously slim chance you will be able to pull the trigger when face to face with a zombie. They were people. Living souls we talk to, laugh with, love, and care for. Shooting someone, even for survival purposes, is not something one goes into lightly. You are still ending a life. Still putting yourself above the needs of another, even if they have been turned into a mindless eating machine. No one will be unaffected by pulling the trigger that first time. Even you macho men, thinking you’ll be the next Dixon on the block, will be changed after you kill your first zombie. Kind souls, those who cherish every life on earth, you’ll have the hardest time.
We’re not going to tell you to suck it up and kill a zombie. However, you need to tell the people you are with when the Z-poc hits where you stand on the matter. Weapons will be sparse. A gun is better off in the hands of someone who can use it than in the hands of someone who will won’t ever be mentally ready to take aim.
Full disclosure
People who suffer from conditions such as bipolar or depression need to make sure others are aware. Those unaffected by these conditions will not understand when they accidentally trigger a bad episode. Life is difficult enough with depression, let alone adding in the stress of life on the run, fighting every day just to stay alive. Simplify things by making sure your companions are fully aware of your mental welfare.
In the end, the number one thing is to be honest with yourself and the people relying on you to survive. Do everything you can to pull your weight, but injuring yourself or causing mental duress in the pursuit of survival is not any way to begin a new life.
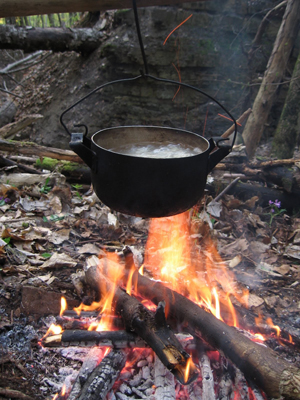
A while back we covered the basics of building a campfire to keep yourself warm if you should find yourself forced to find sanctuary in the woods during the Zombiepocalypse. A campfire is good for more than just warmth. You’ll need it to purify water, cook food, and help clean your laundry and dishes. Heck, it’ll even make for a handy weapon if your camp is ever invaded. Basically, fire is your new buddy the second you find yourself able to set up camp. But make sure the zombies are all dead before you start building your campfire.
Building a fire for the purpose of cooking takes a few extra steps from what we covered in our Fire Safety basics.
Make sure all wood and kindling is dry. Wet wood burns poorly, doesn’t create ideal coals for cooking, and emits unhealthy amounts of smoke.
Build a U-shaped rock border around the fire pit area. The rocks will help hold up the grill, if you have one. The open end of the pit will allow you to spread out the coals to control cooking temperatures.
Fill the entire fire pit with a layer of crumpled paper (or any other starter). Lay kindling over the starter in rows, and another layer of kindling on top of that in rows going the other direction. Do not build a tee pee type fire. You’re creating a bed of coals to cook on. Tee pee fires don’t burn uniformly and won’t create the proper coals.
Light the starter.
As the kindling catches and begins to burn, add 2-3 medium sized pieces of food of uniform shape.
Allow the fire to burn down to coals—approximately 1 hour.
Rearrange the coals with a shovel, creating a ramp with the thickest layer of coals in the back, the thinnest in the front of the pit. You’ve just created a High-Medium-Low setting for your fire pit. High in the back, Low in the front.
Place your grill using the rocks to hold it off the coals.
Cooking Tips:
Foil is Awesome –
Hearty vegetables like corn, potatoes, carrots, turnips; can be washed, wrapped in foil, and set directly onto the coals to cook. Flip them occasionally with tongs to get uniform cooking.
All-in-one meals are a breeze with foil. Cut vegetables into bite-sized pieces. Keep meats a little larger to ensure they have the same cooking time. Wrap everything securely in foil with spices, olive oil, and a little water, wine or lemon juice. Set the foil package on the coals and let it cook. No clean up after. Eat it straight from the foil after it’s cooled.
Non-poisonous leaves can be used instead of foil. Make sure you research plants in your area before being forced to live outdoors because of zombie attack, this way you are well aware of indigenous plants your family can eat and use for survival.
Anything can be a Cooking Pan –
A lot of foods will be canned toward the end. Canned foods are shelf stable, durable, and last a long time. However, they’re not good eats cold. Pop the lid on the can, remove the label, and set the can at the open end of the fire pit. Drag a few coals around to surround the bottom for even heating. Stir every couple minutes. When the food is heated, pull the can using tongs or a pot holder. Super easy. If you wash the can, it can be reused to purify drinking water for your morning coffee.
Even a paper cup can be used to boil water. This takes a little practice, but since paper has a higher ignition temperature than water’s boiling point, in theory you can use a plain Dixie cup to purify water. Set the full cup near the open end of the coals, but not touching. It’ll take a little while, but if your coals are hot, the water will boil.
Hard squashes, such as butternut squash, pumpkin, spaghetti squash, etc. don’t need a pan to cook them. They don’t even need foil. Set the squash on the low end of the coals and roll it occasionally for uniform cooking. Once the flesh is tender (when stabbed with a knife, there’s no resistance), pull it from the heat. Pumpkin in particular is great roasted over a fire. Break it into chunks and cover with butter, brown sugar, and cinnamon. Eat everything down to the pumpkin skin—the skin will be charred from the fire, but the inside is delicious.
Cruddy Cookware is Okay –
Cooking on fire is hard on pots and pans. When packing cooking gear, Do Not use nonstick pans. Open fire burns too hot and will scorch the nonstick coating, releasing potentially harmful chemicals. Go for cast iron or cheap pans without nonstick coating. A good Dutch oven with the lid will let you not only make delicious stews, but bake cakes and other goodies as well right over your campfire.
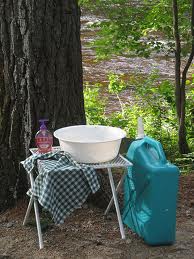
Keeping clean in the Z-pocalypse may seem extremely futile. It would be a shame, though, for any of our ZSC brigadiers to succumb to disease and infection from something mundane when charged with the task of staying one step ahead of the undead menace.
We highly recommend adding biodegradable soap in bar and liquid form to your go bags—not just in your camping gear, but the bag you plan to carry on your person at all times. It is important to keep not only the dishes to you cook and eat with clean, but your clothes and body as well. Below are the best methods for keeping clean without polluting the water source you draw from.
Before you begin washing anything in camp, establish a gray water pit at least 200 feet from your primary water source and away from the camp kitchen to avoid contamination after cleaning. Dig a hole deep enough for the camp’s estimated water usage. Save the excess dirt. When the gray water pit is full or you plan to move camp, cover the pit. This will prevent animals from drinking the soapy water. It will also keep the rain from washing the soap into the nearest water source. Even biodegradable soap can pollute water, poisoning fish and altering the bacteria necessary for the ecosystem in the water.
If the water source is destroyed, you obliterate your chances of surviving. Purifying and boiling will not make gray water or water polluted by soap drinkable.
Washing the Dishes:
There are two methods for washing the dishes. The first is for a small amount of dishes; the second is ideal for large camps that pool resources and chores.
Washing Method #1 (Small campsites)-
In a clean pot, bring at least a liter of water to a rolling boil for over a minute. Allow the water to cool to a temperature you can handle it and move the pot beside the gray water pit.
Using as little biodegradable soap as possible and a clean rag, scrub the cooking utensils and rinse with purified (boiled) water. Make sure all water goes into the pit. (Tip: use a ladle or transfer the water to a bottle for easy, controlled pouring.)
Repeat the scrubbing and rinsing routine with the pots, pans, etc.
Scrub the silverware and rinse in the water left in the pot.
Dump out the rest of the water into the gray water pit.
Leave the dishes to dry somewhere dust-free. Ensure they are completely dry before storing.
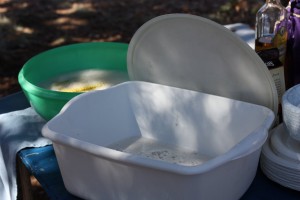
Washing Method #2 (Large campsites)-
Fill three plastic tubs or pots thusly: Pot #1 – 2 liters hot water with biodegradable soap (for washing). Pot #2 – 1 liter hot water (rinsing). Pot #3 – 1 gallon cold water with 12 teaspoons chlorine bleach (sanitizing).
Scrape excess food off of all plates and pans. If food sticks to the pan, fill with water and bring to a boil to loosen it.
Wash in pot #1, using a clean rag. Start with the least soiled items (silverware, cups, etc) to keep the water clean longer.
Rinse in pot #2.
Sanitize in pot #3 for a minimum of 2 minutes. Make sure items are completely submerged.
Leave out to fully dry in a dust-free place before storing.
Dump used water into the gray water pit.
Cleaning Laundry:
Bring a pot of water to a rolling boil for at least 1 minute.
Read the labels on your clothing. (The Z-pocalypse is not the time to shrink your only pair of jeans by accident.) If your clothes all say “Wash, cold water” let the water cool all the way. Use warm water, otherwise.
Add a small amount of biodegradable soap to the water and mix. Do not use detergent. It will pollute the water supply and make animals sick, even with proper grey water disposal.
Submerge the laundry and agitate (stir) using your hand or tongs for a few minutes. Clothing with excess staining will need to be scrubbed with a small amount of soap prior to putting them in the pot to wash. Do not use hot water on bloodstains, even zombie blood.
Remove clothes from the pot and carefully wring out excess water.
Hang to dry.
Dispose of wash water in the gray water pit.
Wash the pot and tongs as described in Dishwashing Method #1 above.
Tip: This technique may also be done in a shallow hole lined with a tarp if a pot or tub is not available.
Washing Yourself
Smelling like a zombie isn’t the only concern we’ll face while on the run from the undead. There are a number of nasty parasites and diseases that can make people seriously ill if they do not bathe regularly. The Z-pocalypse is not the time to skip a shower. Unfortunately, it will be the most difficult time to try and take one.
One can get by for the first few chaotic days by keeping unscented baby wipes in your go bag and taking what amounts to a spit bath twice a day. Dispose of the wipes in the garbage. Do not burn them, the pieces could catch in the wind and start a fire.
After a few days of not-really-bathing, you’ll beg for as close to a shower as you can get. Purify a gallon of water (boil for a minute and cool, you know the routine by now) and find yourself a place reasonably private to wash up, at least 200 feet from your water source. Use biodegradable soap (most handmade soaps fit this bill) and a clean washcloth to bathe. Yes, use this soap on your hair, as well. You only need to wash the roots of your hair. Rinsing will push the soap down the rest of your hair to clean it. Bathe using actual water at least three times a week to keep healthy.
Do not mistake dipping into a lake as taking a bath. Water alone will not kill the pathogens that cling to human skin and hair. And lake water is full of other microbes that can make you ill. Basically, if water is touching you in any way, purify it first.
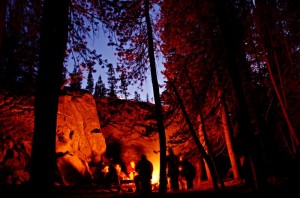
Mankind wouldn’t be anything without the discovery of fire. We’ve come a long way from painting on cave walls and living on the land—so much so, most people wouldn’t know how to accidentally start a fire, let alone create a fire that is safe to cook on and allow their family to gather around. When the Zombiepocalypse hits, we’ll be forced to revert to basic means to survive.
Being able to build a fire is essential to making it past the first week after the zombies show their rotting faces. Not only will you need it to cook food, but also purify water and stay warm. We take for granted the warmth our houses retain courtesy of insulation. Tents and sleeping bags do not make it warm enough to survive outdoors.
There are a few things to remember when building a fire for your survivor camp:
Be sure to place the fire at least twenty feet away from any tents, trees, bushes, and the camp kitchen. This clearance includes low-hanging tree branches.
Chose a location that is blocked off from wind gusts.
Clear away grass, leaves, branches, etc. in a ten-foot diameter around the campfire.
Have a bucket of water and shovel handy, along with a small pile of sand or dry dirt that is free of flammable debris.
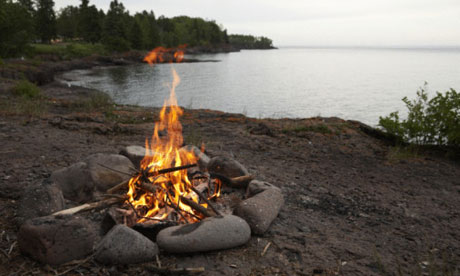
Preparing the fire pit
Dig a circular pit with a three-foot diameter. Make sure the deepest part, the center, is at least a foot deep. (If you happen to have an above-ground fire pit, dig a hole underneath it, this will make disposing of ashes easier after.)
Line the outside of the fire pit with rocks. This will keep people from accidentally stepping into the pit. It will also give you a base to set a grill on top of. (Tip from The Walking Dead: Build the fire pit wall higher to prevent the light from attracting unwanted attention.)
Gather three types of wood: Tinder (small twigs, dry leaves, dry pine needles, dry grass), Kindling (branches 1-inch in diameter and smaller), Fuel (larger pieces of wood. Avoid whole log rounds. They will burn too long to be able to control).
Make sure all wood is dry. Do not burn freshly cut (green) wood, it will smolder and create excess smoke. Green wood does not light easily, either. It takes months to properly dry green wood—up to a year. Gather all the dry wood you can when establishing camp. If you need to cut into a fresh tree, do so only if you plan to remain in camp long enough to let it dry.
Building a fire
Place two to three loose handfuls of tinder in the center of the fire pit.
Add kindling in one of the following formations: Set kindling over the tinder like you’re building a tent; Crisscross kindling over tinder; Stack kindling around tinder (think the walls of a house) and top with smaller kindling (house roof).
Light tinder with a match or lighter and gently fan the base of the fire. Add more tinder as the fire grows, make sure leaves are tucked inside the kindling so they don’t get blown away and accidentally ignite an accidental fire.
Add kindling and fuel wood to keep the fire burning.
Basic Fire Safety
Be sure to keep the fire low, manageable.
Supervise young children and pets near the fire.
Watch for sparks, loose burning leaves. If they drift outside the cleared circle, extinguish them.
Do not leave the fire burning unsupervised.
Do not burn plastic, Styrofoam, or aluminum cans. They create fumes and particles, which are hazardous to inhale.
Do not put glass containers in the fire. They do not burn and could shatter, leaving glass shards everywhere.
Do not burn aerosol cans or closed containers, they will explode.
Extinguishing the fire
Allow the fire to burn down as low as possible before attempting to extinguish. It is preferable to let the fire burn down to ash.
There are two ways to fully extinguish a fire: Water and dirt.
If you are using a metal fire pit Do. Not. Use. Water. Adding water to a metal fire pit will cause it to buckle, making the fire pit unsafe to use in the future. Shovel dry dirt or sand onto the fire one scoop at a time, mixing it with the coals. Continue until no heat radiates from the fire pit. Dump the metal pit out onto the hole below.
The dirt method: You may use the dirt method without a metal pit. Do Not simply bury the coals. Buried coals will continue to burn and become a walking hazard. Buried coals may also ignite tree roots and start a large fire.
The water method: Pour a lot of water onto the coals until the hissing stops. Using a shovel, stir the coals and ash to ensure they are wet. If there are any large pieces of wood in the fire pit, scrape the embers off and stir them into the wet ashes. Continue to mix until the slush of cool to the touch.