The Zombie Survival Crew is proud to announce the newest addition to the Command Center, the man with the ‘stache himself, Mr. Lew Temple! Having already had the honor and privilege of working with Mr. Temple at several conventions, we’re thrilled to have him on board.
Well known for his work on Rob Zombie’s The Devil’s Rejects, Lew’s very impressive body of work includes television, film and theater roles far too numerous to count here. We’ve seen him in Walker: Texas Ranger, caught him in an episode of Justified, heard his distinctive tones in Rango, and most recently saw him as Axl on AMC’s The Walking Dead.
Before testing his acting skills on the stage, Lew played minor league baseball with the Seattle Mariners and Houston Astros. Often described as a chameleon for his ability to successfully tackle and claim almost any role, this Louisiana Bayou native not only comes to us with a plethora of experience, he also has a “killer” sense of style and humor that sets him apart from the rest as one of the best.
Please join us in welcoming Lew Temple into our ranks!
Sure, the Zombiepocalypse has started. Supplies are running low. However, if you’re like me, you’ll find a way to feed yourself and those around you with just a few simple ingredients.
This recipe can be altered to cook over a fire. Note: if you are not using bottled water to cook with, boil the water necessary (plus extra for evaporation) before adding any ingredients.
Prep time: However long it takes Cook time: See above Servings: 6-8
What you need:
Large pot
Spoon
Knife
Blender (hand blender or potato masher)
Ingredients:
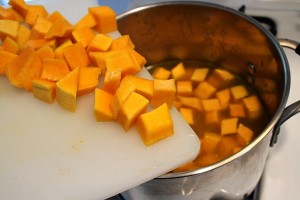
1 large butternut squash – peeled, gutted, and chopped into inch-size chunks
1 medium-sized onion – rough chop
2 cloves garlic – minced
1 tbsp olive oil
½ tsp thyme
2 tsp yellow curry powder
1 tsp brown sugar
4 cups water (use chicken broth or vegetable broth for extra flavor)
Salt and pepper – to taste
1 cup milk (any milk you have, even non-dairy like coconut milk)
How you make it:
Heat the olive oil in large pot over medium heat and add onions. Sautee until the onions begin to turn translucent.
Add the garlic. Sautee for another minute.
Add the squash, thyme, curry powder, and brown sugar.
Cook until the squash begins to turn soft, stirring occasionally.
Add the water (or your liquid of choice) and bring to a boil.
Allow the soup to simmer until the squash is soft enough to squish with the back of your spoon.
Take the pot off the heat. If you use a hand blender or potato masher, squish the squash until everything is smooth. (Note: with the potato masher, the onions will remain whole).
If you use a regular blender, pour a portion of the sup mixture into the blender. Remove the plastic vent-thingy on the lid and cover the hole with a paper towel before blending. Otherwise the heat will build up and you’ll end up wearing dinner. Continue blending batches of the soup until it is all done and return to the pot.
Add the milk. Use enough to thin the soup without making it watery.
Season with salt and pepper until you like how it tastes.
May be garnished with sour cream when served.
If you prefer spicy soups, add a dash of cayenne pepper with the water before boiling. Careful, a little goes a long way.
Being stuck in a world infected by the undead doesn’t mean you have to eat boring foods. Sneak some favorite spices into your go bag on your way to your nearest escape route and fight dull taste buds along with zombies.
Blue Brigade, meet your commander Norman Reedus! This multi-talented actor, filmmaker, photographer, writer and artist has played an Irish vigilante, a sociopathic murderer, street gang leader, a conspirator, the unfortunate snack of cannibalistic humanoids on a deep-space vessel, and – of course- a beloved redneck zombie killer and survivalist.
Norman started making ripples in the film industry in 1997, appearing very briefly in the film Mimic and then taking the starring role in the coming of age tale Floating. Three years later, The Boondock Saints delivered a pair of Irish vigilante twin brothers for our consideration, and the general consensus was clear. Norman’s work as an artist, photographer and filmmaker shows yet another branch of talent for a man who has been described as one of the hardest-working actors in the business.
Norman now has three seasons under his belt as a fan favorite with AMC’s wildly successful zombie apocalypse survival drama The Walking Dead, and even after bidding a very tearful farewell to his onscreen brother, he is still working his crossbow-firing fingers to the bone. Norman is currently filming the fourth season, set to air sometime in October 2013 (We’re still waiting on an exact date, so just clear your Sunday schedule for all of October for now). Norman recently attended the premiere of Sunlight, Jr at the Tribeca Film Festival, and the much-anticipated film Hello Herman is scheduled for release next month.
Between filming, interviews, podcasts, magazine photo shoots, and the never-ending parade of convention appearances all over the world, Norman still can be counted upon to reach out to his fiercely devoted fans through social networking outlets whenever he can, even when we are sure he should be getting a little shut-eye. For his tireless and exhaustive efforts to spread the word, keep hope alive and fearlessly face the shambling hordes time and time again, the Zombie Survival Crew salutes Blue Brigade Commander Norman Reedus.
If you’re just joining us for this series, please be sure to check out our previous Commander Monday reports!
Surely cooking a tasty meal isn’t going to be high on your list of priorities during the early onset, but once you’ve made your way to (relative) safety and your stomach wants more than energy bars and water, it’s time to think about what to do next.
The most obvious first step is to consider your surroundings. Did you escape the city and make a run for the hills? Mountains? Woods? Is there an easily accessible water source? River, stream or lake? Wherever you are, as long as it’s safe to build a small fire and you’ve got the skills to manage it, you’re already one step closer to dinner. This week’s recipe is for those who had the foresight to include fishing gear and aluminum foil in their Go Bags. Even if you lost your gear during the mad dash through the shambling horde, all is not lost. A bit of creative resourcefulness can help anyone can hook a fish or two.
The biggest drawback – fish is very perishable. You can’t take it with you. Without proper refrigeration, your catch of the day will spoil very quickly. If you can, keep it alive in a bucket of water or other container until you’re ready to clean it. Fish is healthy, easy to cook and might just be the best damned thing you’ve ever eaten if you’ve been living on energy bars long enough. You can wrap your catch in leaves and steam it, roast it on a stick or, if you happened to remember to pack aluminum foil and a few choices spices, keep this traditional campfire foil cooking recipe in mind.
Campfire Trout in Foil
Ingredients:
1 large square of aluminum foil (about 24-by-24 inches)
Salt, pepper, any favorite seasonings or wild herbs (Some plants are toxic. Don’t eat it if you don’t know what it is)
2 lemon slices (you can also use apple slices, grapes, wild blackberries or huckleberries)
Butter or a bit of cooking oil
Small trout
Directions:
Clean the fish thoroughly. Good cleaning helps prevent spoilage and the spread of any bacteria. Just chop off the head with a large, sharp knife and gut the fish. Remove the entrails and rinse it out to remove any blood, bacteria, parasites and enzymes. Don’t be squeamish. You’ve just hacked and slashed your way through a zombie hoard, haven’t you? This should be the easy part. Small trout are easy to clean. If there are larger fish available and you’re able to hook one, this part will be a little messier.
Place the aluminum foil on a flat surface and put the trout on top. Sprinkle the fish, inside and out with salt, pepper and seasonings. Put lemon slices on top and a couple pats of butter. Wrap tightly, making sure that the foil is at an even thickness all the way around. Place your foil pack directly onto the coals of a campfire. Cook about 5 to 8 minutes on one side, and then turn. The fish is done when the flesh is opaque and flakes easily.
Simple, right? What? No aluminum foil? Well, that’s all right. Season it and put it on a stick. Find a stick that’s forked and sharpen the prongs a bit with your knife. Insert the prongs of the fork on either side of the backbone. Make sure it’s sturdy or it will end up in the coals. When the fire has burned down to red coals, simply hold the stick so that the fish is about 6 inches from the coals and grill it about 5-10 minutes per side. When it’s flaky, it’s done.
Keeping clean in the Z-pocalypse may seem extremely futile. It would be a shame, though, for any of our ZSC brigadiers to succumb to disease and infection from something mundane when charged with the task of staying one step ahead of the undead menace.
We highly recommend adding biodegradable soap in bar and liquid form to your go bags—not just in your camping gear, but the bag you plan to carry on your person at all times. It is important to keep not only the dishes to you cook and eat with clean, but your clothes and body as well. Below are the best methods for keeping clean without polluting the water source you draw from.
Before you begin washing anything in camp, establish a gray water pit at least 200 feet from your primary water source and away from the camp kitchen to avoid contamination after cleaning. Dig a hole deep enough for the camp’s estimated water usage. Save the excess dirt. When the gray water pit is full or you plan to move camp, cover the pit. This will prevent animals from drinking the soapy water. It will also keep the rain from washing the soap into the nearest water source. Even biodegradable soap can pollute water, poisoning fish and altering the bacteria necessary for the ecosystem in the water.
If the water source is destroyed, you obliterate your chances of surviving. Purifying and boiling will not make gray water or water polluted by soap drinkable.
Washing the Dishes:
There are two methods for washing the dishes. The first is for a small amount of dishes; the second is ideal for large camps that pool resources and chores.
Washing Method #1 (Small campsites)-
In a clean pot, bring at least a liter of water to a rolling boil for over a minute. Allow the water to cool to a temperature you can handle it and move the pot beside the gray water pit.
Using as little biodegradable soap as possible and a clean rag, scrub the cooking utensils and rinse with purified (boiled) water. Make sure all water goes into the pit. (Tip: use a ladle or transfer the water to a bottle for easy, controlled pouring.)
Repeat the scrubbing and rinsing routine with the pots, pans, etc.
Scrub the silverware and rinse in the water left in the pot.
Dump out the rest of the water into the gray water pit.
Leave the dishes to dry somewhere dust-free. Ensure they are completely dry before storing.
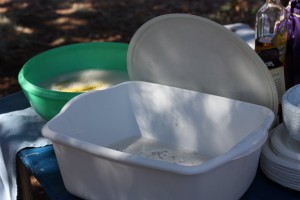
Washing Method #2 (Large campsites)-
Fill three plastic tubs or pots thusly: Pot #1 – 2 liters hot water with biodegradable soap (for washing). Pot #2 – 1 liter hot water (rinsing). Pot #3 – 1 gallon cold water with 12 teaspoons chlorine bleach (sanitizing).
Scrape excess food off of all plates and pans. If food sticks to the pan, fill with water and bring to a boil to loosen it.
Wash in pot #1, using a clean rag. Start with the least soiled items (silverware, cups, etc) to keep the water clean longer.
Rinse in pot #2.
Sanitize in pot #3 for a minimum of 2 minutes. Make sure items are completely submerged.
Leave out to fully dry in a dust-free place before storing.
Dump used water into the gray water pit.
Cleaning Laundry:
Bring a pot of water to a rolling boil for at least 1 minute.
Read the labels on your clothing. (The Z-pocalypse is not the time to shrink your only pair of jeans by accident.) If your clothes all say “Wash, cold water” let the water cool all the way. Use warm water, otherwise.
Add a small amount of biodegradable soap to the water and mix. Do not use detergent. It will pollute the water supply and make animals sick, even with proper grey water disposal.
Submerge the laundry and agitate (stir) using your hand or tongs for a few minutes. Clothing with excess staining will need to be scrubbed with a small amount of soap prior to putting them in the pot to wash. Do not use hot water on bloodstains, even zombie blood.
Remove clothes from the pot and carefully wring out excess water.
Hang to dry.
Dispose of wash water in the gray water pit.
Wash the pot and tongs as described in Dishwashing Method #1 above.
Tip: This technique may also be done in a shallow hole lined with a tarp if a pot or tub is not available.
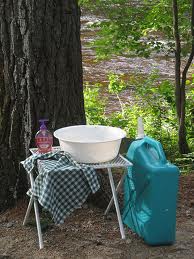
Washing Yourself
Smelling like a zombie isn’t the only concern we’ll face while on the run from the undead. There are a number of nasty parasites and diseases that can make people seriously ill if they do not bathe regularly. The Z-pocalypse is not the time to skip a shower. Unfortunately, it will be the most difficult time to try and take one.
One can get by for the first few chaotic days by keeping unscented baby wipes in your go bag and taking what amounts to a spit bath twice a day. Dispose of the wipes in the garbage. Do not burn them, the pieces could catch in the wind and start a fire.
After a few days of not-really-bathing, you’ll beg for as close to a shower as you can get. Purify a gallon of water (boil for a minute and cool, you know the routine by now) and find yourself a place reasonably private to wash up, at least 200 feet from your water source. Use biodegradable soap (most handmade soaps fit this bill) and a clean washcloth to bathe. Yes, use this soap on your hair, as well. You only need to wash the roots of your hair. Rinsing will push the soap down the rest of your hair to clean it. Bathe using actual water at least three times a week to keep healthy.
Do not mistake dipping into a lake as taking a bath. Water alone will not kill the pathogens that cling to human skin and hair. And lake water is full of other microbes that can make you ill. Basically, if water is touching you in any way, purify it first.
As part of our collective efforts to prepare for the z-poc, ZSC command has undertaken a mission to bring you a series of recipes to keep the body strong and the spirit lifted during dark times. Now, don’t go thinking you’ll be cooking these up in the early days of the infection. You’ll be too busy slaying walkers on the move for this kind of fare. But once the initial dust settles and you’re in the fight for the long haul, you’re going to want something other than the beef jerky, energy bars and chocolate you’ve got stashed in your Go Bag.
Being on the run from the shambling horde doesn’t leave a lot of time for cooking every day, so a good way to get that protein you’ll need is to make some jerky out of whatever large game is in your area when you can’t loot any from surrounding stores any longer. Heck, you could probably even use this for javelina (native to the Southwest and quite the nasty beast in temperament).
Most people don’t realize that Arizona and the Southwest have deer and elk, along with the mountain lions and javelina, so this very basic recipe really goes a long way. I haven’t tried this using javelina, and that’s a different type of meat, but hey, it’s worth a shot. Either way, the meat from a javelina is good to eat. Have a pig roast, if anything.
We’ll just go with the deer/elk/buffalo recipe. I’m also assuming you know how to skin these animals. If you don’t, that should be on your “Top 10 Things I Need to Know for the Zombiepocalypse” list.
First, you’ll want to trim off all visible fat from the meat because it becomes rancid. Cut the flank steak lengthwise with the grain into long thin strips no more than ¼ inch thick. Rub it aggressively with salt cover for 10 to 12 hours so it’ll absorb the salt and release some of its natural juices. At this time, you can add additional spices, fruits, liquids, etc. This is why I require spices in the Yellow Brigade Go Bag (you’ll have to be logged in to view that link).
Next, you’ll need to build a scaffold to support the meat over a slow fire beneath it; the heat and the smoke completes the process in half a day, and with an occasional sunning, the meat will keep for months.
Not too hard, right? Just get yourself somewhere safe for a couple of days so you can do this and you’ll have that protein you need for a good long while, depending on the size of the animal, of course.
Happy hunting!
I’d like to thank my ex-husband, the bow hunter from Wyoming, for helping me with this.
Our mission here at the Zombie Survival Crew is straightforward and true: Keeping you safe from the shambling horde, and taking human beings off the endangered species list one zombie at a time. As you browse through our field reports, you’ll find information that is vital to the survival of the human race as a species, entertaining, educational and downright practical. Our fearless leaders are experienced in dealings with not only zombies, but also vampires, werewolves, alien insects and monsters of the regular human variety. But few in our esteemed command crew have ventured into a less-often traveled realm of the paranormal, the world of ghosts, spirits, shadows and things that go bump in the night. This week’s report focuses on one such unique individual, Special Forces Brigade member Britt Griffith.
Born and raised in sunny Southern California, Britt was born into the world of Lights, Camera, Action. Well-acquainted with the business both behind and in front of the cameras, Britt already had all the tools he needed from a very young age. Which of course led him to stray off the path for a brief decade or so, taking a blue collar job and working hard while pursuing a lifetime hobby of paranormal investigations. In 2008 fate brought him back in front of the cameras, where he found a way to continue his most-loved hobby by joining the team on SyFy Channel’s Ghost Hunters and Ghost Hunters International. Britt left GHI in early 2012 to pursue other interests He has appeared in several television series, including Food Network Challenge, Run This Town, Chillerama, and the films Azienda and 5 Minutes.
Britt recently appeared in the 2012 film The Black Dahlia Haunting, and is working on several other projects including one short and two full-length feature films.
When not filming, chasing ghosts or wrangling large snakes, Britt continues to travel and appear at various events, including lectures on paranormal activity and investigation. He also is a devoted supporter of the Dyslexia Foundation, and spends much of his free time tutoring and mentoring youngsters with learning disabilities.
Coming soon for Britt: keep an eye on the horizon for The Zodiac Legacy, scheduled for release in 2014!
If you’re just joining us for this series, please be sure to check out our previous Commander Monday reports!
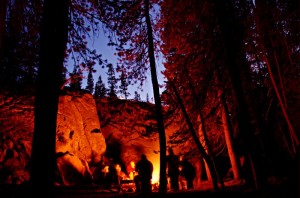
Mankind wouldn’t be anything without the discovery of fire. We’ve come a long way from painting on cave walls and living on the land—so much so, most people wouldn’t know how to accidentally start a fire, let alone create a fire that is safe to cook on and allow their family to gather around. When the Zombiepocalypse hits, we’ll be forced to revert to basic means to survive.
Being able to build a fire is essential to making it past the first week after the zombies show their rotting faces. Not only will you need it to cook food, but also purify water and stay warm. We take for granted the warmth our houses retain courtesy of insulation. Tents and sleeping bags do not make it warm enough to survive outdoors.
There are a few things to remember when building a fire for your survivor camp:
Be sure to place the fire at least twenty feet away from any tents, trees, bushes, and the camp kitchen. This clearance includes low-hanging tree branches.
Chose a location that is blocked off from wind gusts.
Clear away grass, leaves, branches, etc. in a ten-foot diameter around the campfire.
Have a bucket of water and shovel handy, along with a small pile of sand or dry dirt that is free of flammable debris.
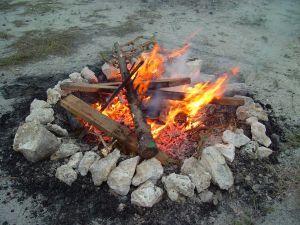
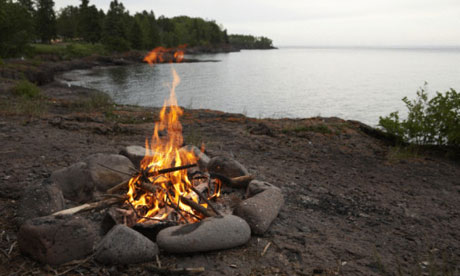
Preparing the fire pit
Dig a circular pit with a three-foot diameter. Make sure the deepest part, the center, is at least a foot deep. (If you happen to have an above-ground fire pit, dig a hole underneath it, this will make disposing of ashes easier after.)
Line the outside of the fire pit with rocks. This will keep people from accidentally stepping into the pit. It will also give you a base to set a grill on top of. (Tip from The Walking Dead: Build the fire pit wall higher to prevent the light from attracting unwanted attention.)
Gather three types of wood: Tinder (small twigs, dry leaves, dry pine needles, dry grass), Kindling (branches 1-inch in diameter and smaller), Fuel (larger pieces of wood. Avoid whole log rounds. They will burn too long to be able to control).
Make sure all wood is dry. Do not burn freshly cut (green) wood, it will smolder and create excess smoke. Green wood does not light easily, either. It takes months to properly dry green wood—up to a year. Gather all the dry wood you can when establishing camp. If you need to cut into a fresh tree, do so only if you plan to remain in camp long enough to let it dry.
Building a fire
Place two to three loose handfuls of tinder in the center of the fire pit.
Add kindling in one of the following formations: Set kindling over the tinder like you’re building a tent; Crisscross kindling over tinder; Stack kindling around tinder (think the walls of a house) and top with smaller kindling (house roof).
Light tinder with a match or lighter and gently fan the base of the fire. Add more tinder as the fire grows, make sure leaves are tucked inside the kindling so they don’t get blown away and accidentally ignite an accidental fire.
Add kindling and fuel wood to keep the fire burning.
Basic Fire Safety
Be sure to keep the fire low, manageable.
Supervise young children and pets near the fire.
Watch for sparks, loose burning leaves. If they drift outside the cleared circle, extinguish them.
Do not leave the fire burning unsupervised.
Do not burn plastic, Styrofoam, or aluminum cans. They create fumes and particles, which are hazardous to inhale.
Do not put glass containers in the fire. They do not burn and could shatter, leaving glass shards everywhere.
Do not burn aerosol cans or closed containers, they will explode.
Extinguishing the fire
Allow the fire to burn down as low as possible before attempting to extinguish. It is preferable to let the fire burn down to ash.
There are two ways to fully extinguish a fire: Water and dirt.
If you are using a metal fire pit Do. Not. Use. Water. Adding water to a metal fire pit will cause it to buckle, making the fire pit unsafe to use in the future. Shovel dry dirt or sand onto the fire one scoop at a time, mixing it with the coals. Continue until no heat radiates from the fire pit. Dump the metal pit out onto the hole below.
The dirt method: You may use the dirt method without a metal pit. Do Not simply bury the coals. Buried coals will continue to burn and become a walking hazard. Buried coals may also ignite tree roots and start a large fire.
The water method: Pour a lot of water onto the coals until the hissing stops. Using a shovel, stir the coals and ash to ensure they are wet. If there are any large pieces of wood in the fire pit, scrape the embers off and stir them into the wet ashes. Continue to mix until the slush of cool to the touch.
As part of the ongoing effort to keep our loyal members well fed during the Z-Pocalypse, we’re taking a look at a very important aspect of daily nutrition – comfort food. Whether standing alone or as a side dish with your favorite post-apocalyptic meal, macaroni and cheese is the ultimate comfort food. As long as fresh milk, cheese, butter and eggs are still available, this long-time favorite of Blue Brigade Commander Norman Reedus can be easily prepared almost anywhere.
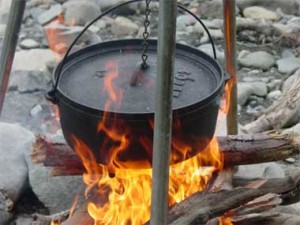
If you’re fortunate enough to have found safe haven in a place with a working kitchen, this one is a snap. But even with a simple wood stove or an outdoor campfire, this recipe can also be prepared in a deep skillet or in a Dutch oven.
Melt the butter in the bottom of the Dutch oven, then stir in the flour to make a light roux. Add the salt. Mix milk with beaten egg and blend in until thick and bubbly then add in 5 cups of cheese, stirring until melted. Stir in cooked macaroni noodles then top off with balance of cheese. Set dutch oven over campfire until heated through and slightly browned on top.
It certainly goes without saying that as daily survival gets tougher, items such as fresh milk and cheese may no longer be easily available. In preparation for this stage, you might want to stock up on dry goods. Boxed macaroni and cheese dinners can be made with powdered or evaporated canned milk. You can also use macaroni and cheese sauce mixes. If available, canned tuna or chicken and canned vegetables can be added for extra fuel and nutrition.
As part of our collective efforts to prepare for the z-poc ZSC command has undertaken a mission to bring you a series of recipes to keep the body strong and the spirit lifted during dark times. Now, don’t go thinking you’ll be cooking these up in the early days of the infection. You’ll be too busy slaying walkers on the move for this kind of fare. But once the initial dust settles and you’re in the fight for the long haul, you’re going to want something other than the beef jerky, energy bars and chocolate you’ve got stashed in your Go Bag.
Red Brigade is first out of the gate for our new Tasty Survival Skill series of recipes ZSC brigaders can use to prepare for and survive cataclysmic events up to, and including, a full blown zombie infestation.
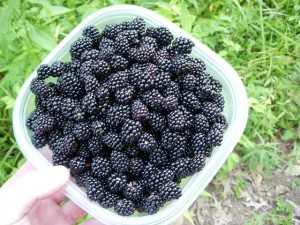
Blackberry preserves may not seem like the most intuitive survival recipe, but when the world falls apart having something sweet on hand is never a bad plan.
Preserves can be made in advance, stored for long periods of times, and best of all, the United States is one of the largest producers of blackberries in the world. Blackberry varieties can be found in almost every State. If you don’t prepare preserves in advance of a cataclysmic events, once the dust settles, it won’t be hard to find them in farming country close to almost all of the ZSC’s designated meet up points, or anywhere you decide to hold up for the medium- or long-term.
Directions:
1. Rinse the berries in cold water and drain
2. Put berries into a stock pot and mash to extract juices.
3. Add sugar and mix. Add cinnamon and/or nutmeg, as desired.
4. Bring to a boil over a high heat, while stirring constantly.
5. Add pectin and return mixtures to a full boil for one minute.
6. Skim off all the foam.
7. Ladle or pour the preserves into sterile Mason jars. Leave at least ½ inch empty at the top. Make sure to wipe clean the rims before you cap and seal.
8. Place filled Mason jars in a stock pot with enough water to cover the jars by 1-2 inches. Cover and bring to a boil. When water is boiling, set your watch for five minutes.
9. Remove jars and place off to the side. Allow to sit for at least 12 hours, preferably 24. Check the seals and remove bands.
10. Consume at will!