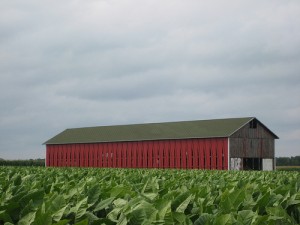
In our new ongoing assignment, the Orange Brigade took on the job of scouting possible food sources during the zombiepocalypse within each of the zones laid out for our Tasty Survival series. One thing we’re all guilty of is not looking in our own backyards for ways to survive. Check for local farms you can hit on your escape routes to add to the canned/dried goods that should already be in your go bags. Grab fresh produce while you can. It will not last long once there is no one to tend to the crops. Kill only what livestock you need to feed your party. Don’t waste food others could use.
This is what we discovered for the Yellow Brigade’s zone in the mid-west.
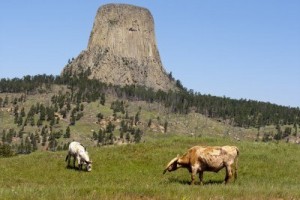
Wyoming:
Just over half of the land in Wyoming is dedicated to farmland.
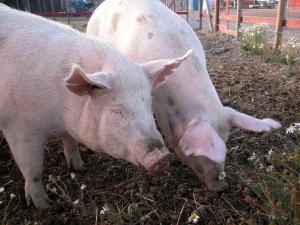
86% of farms in the state raise livestock and process livestock products. Cattle are the primary product, by a large margin. Hogs and sheep can also be found if you know where to look.
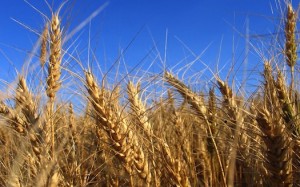
The remaining 14% of farms grow crops. While the top crop is hay, Wyoming also offers sugar beets, barley, dry beans, and wheat.
Make a pit stop for meat and hope you find a farm with edible produce on your escape routes. You’re not going to find a lot of variety, but at least you’ll have food.
Nevada:
Only 9% of Nevada is used as farmland.
68% of Nevada farms house livestock, with a focus on cattle and dairy products.
32% of the farms produce crops, with a large focus on hay.
You can also find onions, potatoes, wheat, and garlic at select locations.
Utah:
22% of Utah is used as farmland.
A vast majority, roughly 79%, of the farms in the state raise cattle, hogs, sheep, and process dairy products.
21% of Utah farms grow crops. The top two products are hay and green house plants. However, you can still find wheat, onions, and apples on your way through the state.
Nebraska:
An overwhelming portion of Nebraska is utilized as farmland, approximately 93% of the state.
The majority of farms raise livestock. The main livestock is cattle, followed by hogs.
The remaining 38% of Nebraska farms grow grain corn to feed the cattle, soybeans, wheat, hay, and dry beans.
While this state is rich in farms to visit on your escape routes, the variety of food leaves much to be desired. There are few crops that will sustain humans for the long-term after the zombiepocalypse.
Colorado:
Just under half of the land in Colorado is used as farmland.
76% of farms in the state raise cattle and hogs. Colorado is the number one producer of lamb and sheep for consumption in the United States.
24% of Nebraska farms grow crops. The top two commodities are grain corn and greenhouse plants. However, you may still find wheat, potatoes, onions, and dry beans at farms on your way to safe haven.
Arizona:
Approximately 36% of the state is farmland.
47% of Arizona farms house livestock, with a focus on cattle on dairy products.
The remaining farms grow lettuce, cantaloupes, broccoli, and cauliflower.
Despite the temperatures, Arizona produces a wide variety of food that should sustain survivors for a decent amount of time.
New Mexico:
Over half of the state, about 58%, is dedicated to farmland.
A large majority of farms house livestock and process livestock products. The main focus is on dairy products, cattle, and sheep.
22% of New Mexico farms grow crops ranging from pecans to chili peppers, corn, onions, and wheat.
Like its neighbor, Arizona, there is just enough variety in produce and livestock to keep survivors in the state fed for a while.
It would be wise to find ways to preserve or dry meat, since it is the most prevalent commodity.
Hawaii:
Just about 32% of the island state is farmland.
Only 17% of Hawaiian farms raise livestock, focusing on cattle, dairy products, and chicken eggs.
The majority of farms, roughly 83%, grow crops. There is quite a bit of variety, including pineapple, sugarcane, macadamia nuts, papaya.
Hawaii is the only state to grow the following: Coffee, bananas, ginger root, guava, macadamia nuts, papaya, pineapple, and taro.
This means once the zombies take over, the rest of the U.S. can kiss these items goodbye. Life without coffee? Start stocking up now, guys!
There you have it, the resources available to brigadiers living in the Yellow Zone! This zone has a wide range of food available to them. Other brigades should take note and consider these states for their ultimate safe haven.
For our newest assignment, the Orange Brigade took on the job of scouting possible food sources during the zombiepocalypse within each of the zones laid out for our Tasty Survival series. One thing we’re all guilty of is not looking in our own backyards for ways to survive. Check for local farms you can hit on your escape routes to add to the canned/dried goods that should already be in your go bags. Grab fresh produce while you can. It will not last long once there is no one to tend to the crops. Kill only what livestock you need to feed your party. Don’t waste food others could use.
This is what we discovered for the Blue Brigade’s zone on the Northeast coast:
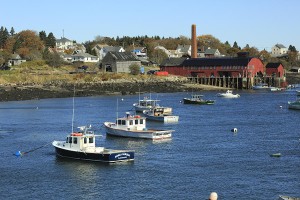
Maine:
Only 7% of the land in Maine is used for farmland.
60% of farms in the state house livestock, focusing on dairy products, chicken eggs. Aquaculture is also important—cultivating fish, shellfish, and other aquatic species.
The remaining 40% of Maine farms grow crops ranging from potatoes, to blueberries, apples, and corn.
We suggest grabbing as many potatoes as you can carry. They have vital nutrients and do not spoil quickly if kept in a dry, dark environment.
New Hampshire:
A small percentage of New Hampshire is utilized for farmland—roughly 8%.
44% of the farms are used for livestock, with cattle, dairy products, and chicken eggs being the most prevalent.
56% of New Hampshire farms are used for crops. The main focus is on greenhouse plants, however many farms also produce apples, sweet corn, and maple products.
Don’t linger long in the state. Route your escape routes to hit a couple farms, then head to a state with a wider variety of food available.
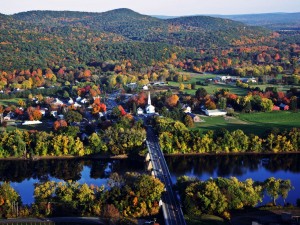
Vermont:
21% of the land in Vermont is farmland.
The majority of farms in the state—85%—house livestock or create livestock products. By far, the number one commodity in the state is dairy products.
Only 15% of Vermont farms produce crops.
The main crop is greenhouse products, not very useful. However you can still find apples, sweet corn, and maple products in the state.
Massachusetts:
A scant 10% of the state is dedicated to farming.
23% of the farms house livestock, with a focus on dairy products, cattle, and seafood.
The remaining 77% of Massachusetts farms focus on producing greenhouse plants, cranberries, sweet corn, and apples.
Grab what food you can on your way out of the state. The supplies won’t last for long.
New York:
A quarter of the land in New York is used as farmland.
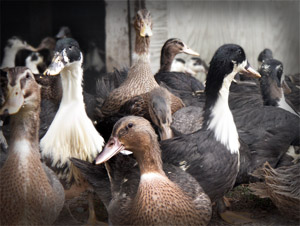
63% of the farms house livestock, with the main commodity being dairy products, followed by cattle and chicken eggs. New York is the only state producing duck for consumption.
37% of New York farms produce crops. You’ll be able to find apples, onions, potatoes, and cabbage on your way to safe haven. The state ranks second in apple production.
Grab a duck, some apples, and an onion to roast together. Dang, I made myself hungry.
Rhode Island:
Approximately 9% of the small state is utilized as farmland.
15% of Rhode Island farms house livestock. The main focus is on dairy products and cattle.
A vast majority of the farms produce greenhouse plants. However, you may be able to find sweet corn, potatoes, and apples if you know where to look.
Grab and go, guys. Rhode Island isn’t large enough to sustain large numbers of survivors.
Connecticut:
Only 12% of the state is used for farmland.
34% of Connecticut farms focus on dairy products, chicken eggs, and seafood.
The remaining 66% of farms in the state grow greenhouse plants, sweet corn, and apples. If you’re lucky, you’ll also find farms with peaches, pears, and mushrooms.
There you have it, the local resources housed in the Blue Zone. This isn’t a resource-rich area farming-wise unless you are near the coast and are able to fish. Take extra care when plotting your escape routes. Make sure to hit a few farms on your way through to a safe haven.
Heads up! We’ve got a tasty treat for you today for Lt. Blue Brigade, with some down home cooking from Iowa! In other words….DESSERT!
Grandma Corabelle’s Fudge Brownies
1 cup butter
12 heaping tbsp unsweetened cocoa
2 cup sugar
1 tbsp vanilla
4 large fresh eggs
1 1/2 cup flour
1/2 tsp salt
1 cup chopped nuts, if ya like
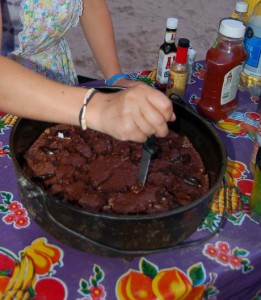
Mix together butter and cocoa in dutch oven (or saucepan) and heat slowly till the butter is melted. Let it cool till it’s lukewarm. Beat in sugar and vanilla. Beat the eggs in, one at a time. Stir in flour and salt just till it’s mixed, and fold in nuts.
Bake in dutch oven with low fire/coals for about 25 minutes, and the top has lost its shine. Use a knife to scrape the sides for easier removal, or just scoop it out into bowls!
Thanks to fellow ZSC member Beth of Orange Brigade for offering up this wonderful family recipe!
The main concern during the zombie apocalypse is food rations. A person can only carry so much food with them. A two week supply at most, and even then their go bag may become too heavy to carry on the run from the undead. The Orange Brigade took on the job of scouting possible food sources within each of the zones laid out for our Tasty Survival series. One thing we’re all guilty of is not looking in our own backyards for ways to survive. Check for local farms you can hit on your escape routes to add to the canned/dried goods that should already be in your go bags. Grab fresh produce while you can. It will not last long once there is no one to tend to the crops. Kill only what livestock you need to feed your party. Don’t waste food others could use.
This is what we found for the Red Brigade’s zone on the east coast.
Pennsylvania:
Approximately 27% of the state is comprised of farmland.
68% of the farms raise livestock or process livestock products (dairy, eggs, etc.). The top product in the state is dairy.
Only 32% of Pennsylvania farms produce crops. Most of the farms are greenhouses, growing plants, not produce. The second top crop in the state are mushrooms.
When preparing your escape routes, make sure each one passes by a farm to gather supplies.
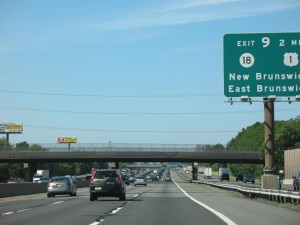
New Jersey:
Approximately 17% of the state is farmland. You really want to keep an eye out for possible food sources, here.
22% of the farms raise livestock and/or process livestock products. However, most of them raise horses and mules. Dairy farms are the second most prevalent after horse ranches.
78% of New Jersey farms grow crops, with a majority producing greenhouse and nursery products. Blueberries and peaches are second and third in produce production.
We suggest brigadiers in the state do not linger long. The sparse resources will vanish quickly.
Delaware:
Approximately 42% of the state is farmland.
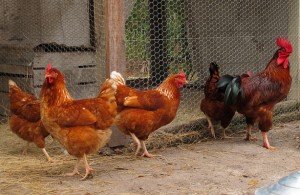
80% of the farms raise livestock and/or process livestock products. Chickens compromise 73% of livestock products.
20% of Delaware farms grow crops, primarily focused on grain (feed) corn for livestock, and soybeans.
Grab a cage of chickens on your way out of town, and pack extra cans of vegetables.
Maryland:
Approximately 33% of the state is farmland.
58% of the farms in Maryland raise livestock and process livestock products. Chicken is the primary livestock product. You guys need to grab some cages, too.
42% of Maryland farms grow crops. However with a focus on greenhouse products, soybeans, and grain corn, pickings are scarce.
We recommend you grab a few chickens and head toward a state with more variety in crops.
West Virginia:
Only 23% of West Virginia is dedicated to farmland.
82% of the farms raise livestock, with chicken and cattle being the most prevalent.
17% of West Virginia farms grow crops. Most of it is hay and grain corn.
You can’t haul a cow around, but if you know how to butcher your own meat and have a place to store it (or dry it), go ahead and take down a cow. Keep an eye out for apple orchards in the fall and load up on the nutritious fruit.
Virginia
34% of Virginia is farmland.
66% of the farms house livestock. Chicken, cattle, and dairy are the leading products in the state.
33% of the farms grow crops. Variety of produce is slim.
Try to find a farm growing tomatoes, wheat or apples.
North Carolina
Approximately 29% of North Carolina is farmland.
65% of those farms produce livestock, with hogs and chicken being the most prevalent.
The 35% of farms growing crops mostly focus on greenhouse plants, tobacco, and cotton.
You may be able to find some sweet potatoes, blueberries, and cucumbers if you know where to look on your escape route.
South Carolina:
Only 25% of South Carolina is farmland.
56% of those farms house livestock—primarily chicken, turkey, and cattle.
The remaining 44% of South Carolina farms grow greenhouse plants, tobacco, cotton…the list of non-food items goes on.
Try to plot your escape routes to hit the few farms growing peaches, tomatoes, cucumbers, and squash.
There you have it, the Red Zone and all it has to offer for food sources. Take a look at the farms around you and start plotting your escape routes.
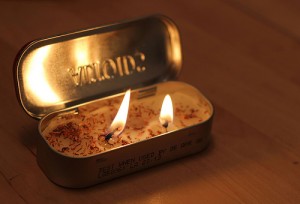
When you’re engaged in the tricky business of survival, there may be times when building a fire simply isn’t possible. Could be a lack of wood to burn, or fear of attracting unwanted attention from the undead. Either way, humans are not built to see in the dark and batteries will only get you so far after you’ve abandoned your homes in search for a safe haven. Candles are an ideal way to light your way in the dark. They aren’t too hard to make, either. Homemade candles allow you to create something that’ll fit perfectly in your go bags without sacrificing room for your Oreos and beef jerky.
Below, we’ve included instructions for a basic candle. Be extremely cautious when handling hot wax. Use utensils and pots you don’t care about (we suggest snagging cheap items from a discount store). Wax doesn’t clean off easily.
What You’ll Need:
Soy wax flakes or a block of beeswax
Wick (make sure they’re longer than your container.)
Containers (can be just about anything that won’t melt with the hot wax – mason jars, Altoid tins, old glass/porcelain cups, etc.)
Pitcher with spout or a funnel
Fragrance oil (10-15 drops per 5.5 ounces of wax) Use cinnamon, eucalyptus, or citronella to keep biting bugs away. (Note: this does not include zombies.)
Popsicle sticks (with a hole in the middle), chopsticks, pencil–something to hold the wick straight.
How to Make a Candle:
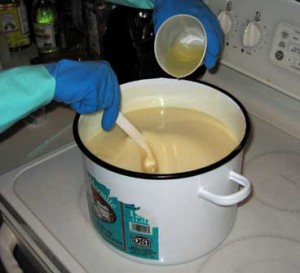
Melt soy wax flakes or beeswax in a double boiler.
Once the wax completely melted, set your pot aside to cool for a little bit.
Add essential oils.
Dip metal wick base in wax and set into the container. The wax will “glue” the base in place.
Carefully pour wax into containers with funnel or transfer wax to a pitcher and pour.
Thread wick with Popsicle stick or tie around pencil/chopstick, and let the candle cool for a few hours until solid.
Once the wax is completely set, trim wicks, leaving about ¼ of an inch above the wax.
Ta-da! Simple and easy. If you add the right essential oils, these candles will be another line of defense against bugs and the boogeyman.
You’ll need a pot to cook over a fire, tongs, gloves, a bowl and an instrument to mash like a potato masher.
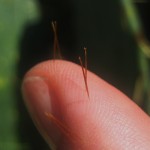
Pick fruit with gloves and tongs. You don’t want to prick yourself with those needles! There’s a reason it’s called Prickly Pear.
While holding the fruit under running water with the tongs, brush off the needles with a wire brush. Yes, a wire brush.
Place them in a pot. Cover with water and boil until tender (about 1 hour). Cut them in half after cooking, as they will mash easier. Drain and mash with a potato masher. Strain with double thickness cheesecloth (juice should be clear, no needles, etc.). Put pulp in garbage, not disposal (if indoors).
Measure 2 cups prickly pear juice with 1 ¾ oz. pkg. pectin, assuming you’ve got some with you. If not, raid a local grocery store because let’s face it, no one’s going to be yanking pectin off the shelves during an apocalypse. Bring to boil, stirring constantly.
Add 3 ½ cups sugar and 3 Tbsp. lemon juice. Boil—rolling boil—for 3 minutes . . . stir constantly.
Remove from heat and skim off foam.
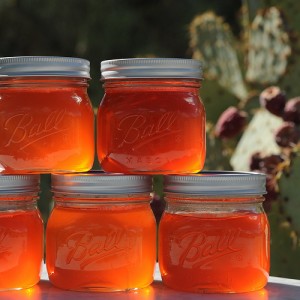
Pour into glass jars and seal.
Mmm mmm good! Now you have jelly to go with whatever your apocalypse breakfast will be!
You’re welcome.
Jinxie G
PS: Jinxie would like to thank her wonderful Aunt Pat for this recipe! =)
Earlier this year, we reminded ZSC brigadiers that Soap is Your Friend when surviving in the zombie apocalypse, or after any cataclysmic event forcing people from their homes. As a follow-up, we scoured the internet for a handful of useful recipes, should brigadiers need to make their own soap, shampoo, laundry detergent, etc.
Please note:Making lye-based soaps can be dangerous.
Follow the safety directions on the sites linked below carefully. They know what they’re doing, which is why we’ve “outsourced” to provide you all with this handy skill.
Keeping a well-stocked survival kit isn’t always a possibility given how expensive certain necessary elements can be. For instance, tents and other portable shelters. Sure, you can find cheap tents that’ll do the job, but will they be big enough? Can you carry them and all of your gear? From personal experience, toting around camping gear for one person to last one weekend—with access to food, so no ice chest—is an ordeal. When you’re running from zombies, you’re not going to be able to carry everything and a bulky tent bag. And what happens if your tent is damaged or you’re forced to abandon it during an attack? Below, we’ve listed a few ways you can minimize your packing list and still find cover in a pinch. These are all improvised shelters which take time to set up. Do not put off setting up your camp site until sundown if you plan to use these methods.
Tarp designs:
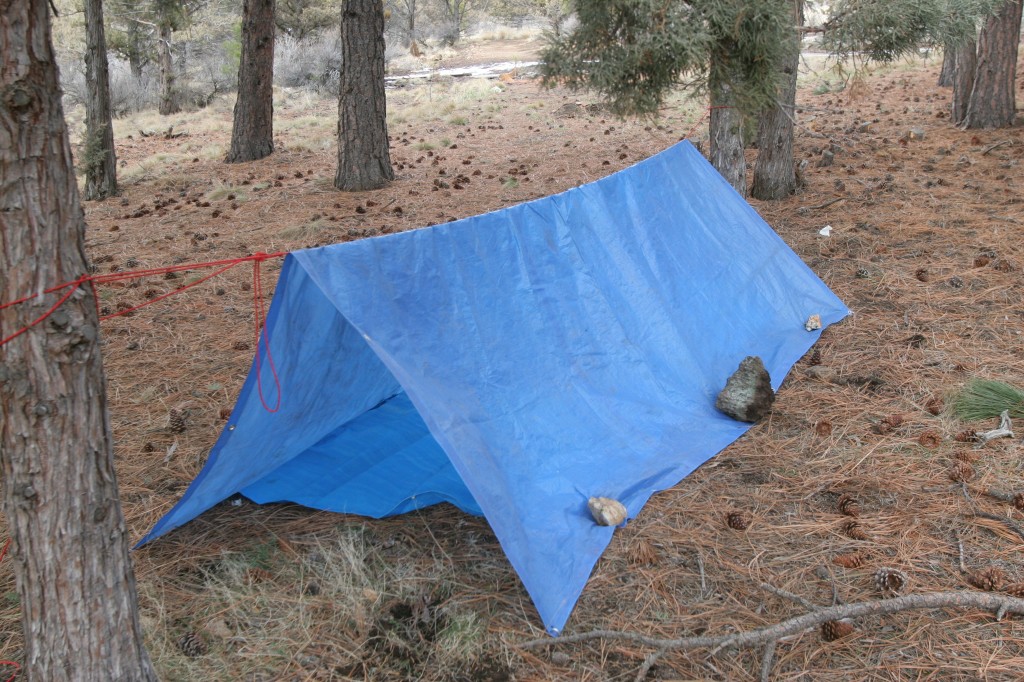
Between two trees – You’ll need: Rope, stakes (or heavy rocks to hold top tarp in place), 2 large tarps. Optional: 3-inch diameter stick long enough to reach between the trees. How to: String the rope between trees about 3 feet from the ground (or brace the branch in natural Ys formed by the trees). Stake down one edge of the tarp. Drape the tarp over the rope/branch. Stake down the opposite side of the tarp. Fold remaining tarp and lay it on the ground under the first. Good for: Getting out of the rain. This design will retain minimal heat, since both ends are open to the wind.
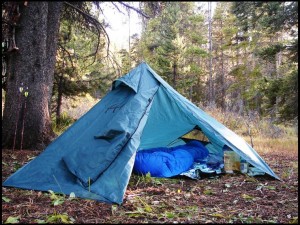
Hanging tepee style – You’ll need: Rope or para-cord, 2 large tarps, rocks or stakes. How to: Find a tree with a branch about 6 feet from the ground. Fold first tarp so you can tie a rope around one edge. Toss the rope over chosen branch and pull until the tarp is almost all the way off the ground, leaving enough slack to secure with stakes or rocks. Tie remaining rope around tree trunk. Pin down the bottom edge of the tarp in a circle, leaving a “door” where the sides meet. Fold remaining tarp and lay on the ground inside the “tepee”. Good for: Blocking wind, keeping somewhat dry, privacy.
Blanket time – You’ll need: 1 tarp. How to: In a pinch, drape yourself in the tarp, don’t cover your face, and curl up for the night. It won’t be comfortable, but will retain heat and keep you somewhat dry.
Using what Nature gave us:
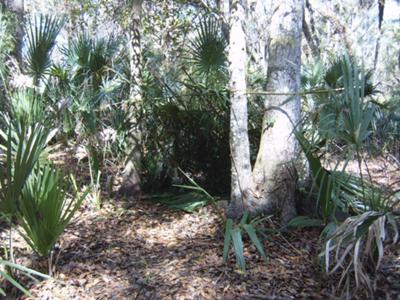
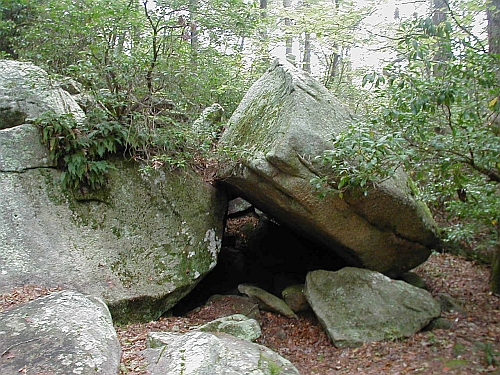
Between a rock and a leafy place- You’ll need: a large boulder, numerous long tree branches, leaves, moss, and leafy branches. How to: Lean the long branches against the boulder (remember: there should be enough space between the branches and rock for you to crawl through) in a row roughly 6 feet long. Cover the long branches with smaller, leafy branches. Cover those with moss and loose dry leaves. You want to cover as much as possible (until no light shines through the inside of the shelter) to retain some heat and provide a barrier from wet weather. A layer of dry leaves inside the lean-to will keep ground moisture and cold from seeping into your sleeping bag or clothes while you rest. A variation of this lean-to can be made by creating a 3-pole brace to lean the long branches against before covering them—two upright, one across the top.
Natural crawlspaces – Keep an eye out for rock formations, fallen trees, etc which provide natural cover, or enough cover you can pile up leafy branches and leaves on top to increase the cover available. Check for animals, first!
In the last few months we’ve brought you recipes for z-poc ready dishes including blackberry jam, dried meat and squash soup. Which recipes you’ll be able to use will depend in a large part of where you find yourself in the midst of the infection and how easily you can get to fresh ingredients.
And if you find yourself near a lake, stream, ocean or river, fish should be in plentiful supply. So here’s a quick, easy, and ever-alterable, recipe from the Red Brigade that will work with virtually any fish you can catch and can be tailored to fit your immediate environment, available ingredients and personal tastes.
You’ll need an 12″ square piece of tinfoil (heavy duty if you have it) and butter or some oil. Add enough butter or oil to keep the fish from sticking to the foil. Take your fish fillet or whole, cleaned fish and put in the middle of the foil. (In case you missed it, Lt. Blue Brigade provided a quickie lesson in cleaning fish)
Add choice of sliced vegetables, garlic, lemon juice, spices or other items for flavor. Whatever you can find in you Go Bag or surrounding environment, it’s hard to go wrong here.
Fold the tinfoil to contain the heat and juices…this is important. A loosely folded or crumbled tinfoil ball will take longer to cook and a lot of flavoring and moisture will escape through the cracks and holes.
Place the foil in the hot campfire coals. For small fillets bake on each side for approximately 3 minutes. Larger fillets can take as long as 10 minutes per side.
Allow to cool a few minutes before eating. Open the packet carefully, there will be hot steam.
The internet is chalk-full of information to help us survive after any cataclysmic event—natural and manmade. You can lose yourself for days trying to gather everything by yourself. We’ve done some of the work for you, brave brigadiers. Below you’ll find a handful of advice we found online to help you once the zombies rise and force us to abandon our homes.
Light Sources
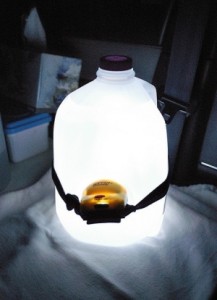
Fill a gallon jug with water. Strap a headlamp or flashlight onto the jug, with the light facing inward. This will illuminate a small space, like a tent, with soft light. No glares and no bright beams which could attract predators to your camp.
Fill a clear soda/water bottle with half water and half bleach. Set the bottle into the roof of any shack or improvised shelter with a sturdy roof. The mixture will reflect sunlight, creating approximately the same wattage as a 55-watt light bulb. Note: This is a daytime-only solution.
Crayons! We haven’t personally tested this trick yet, but if you need a quick emergency light source, light a crayon. It should provide the same amount of light as a small candle for about 30 minutes. Note: Not ideal for handling, the wax will drip. Make sure you have a sturdy, clutter-free spot to set the lit crayon.
Fire Starters
There are a lot of options for homemade fire starters. We chose two that required very little work and used items which would normally just be thrown away. For both, set them with the kindling at the base of your fire and carefully light the edge.
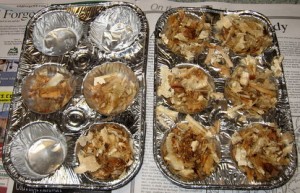
Muffin Fire Starter
Needed:
Muffin Tin
Paper muffin wrappers
Dryer lint
Melted wax (crayons work!)
Set the paper muffin wrappers in the muffin tin. Fill the bottom of each wrapper with a wad of dryer lint. Pour the wax over the lint, leaving about a quarter of an inch of room at the top so you have a place to light the fire starter. Allow to cool thoroughly before packing.
An alternative method utilizes an empty cardboard egg carton. Put in the lint and wax as described above. When the wax has set, cut the egg carton apart.
Tube Fire Starters
Needed:
Cardboard toilet paper tubes
Dryer lint
Newspaper
String (optional)
Pack dryer lint tightly into the toilet paper tube. Wrap the filled tubes with newspaper. Tuck the ends of the newspaper into the tube, or tie off the ends with string—either way works, so long as you trap the lint so it doesn’t fall out in your go bag.
Containing the little things
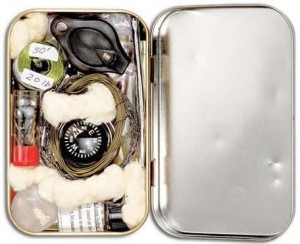
Don’t throw out those Altoids (or similarly-sized) tins! They’re incredibly helpful when packing your go bag. Here’s some ideas:
Sewing kit –Pack with sewing needles, straight pins, safety pins, tiny spools of common-colored thread, buttons, small scissors, seam ripper, and anything else you need to mend or make your own clothing.
Fire lighting kit – Pack with matches, a lighter, flint, and a small wad of dryer lint or some other easy-to-light material. Affix a piece of sandpaper to the inside of the tin’s lid to light the matches.
Individual first aid kit – Pack with bandages, alcohol wipes, tweezers, packets of antibiotic ointment, Tylenol, aspirin, Benadryl, other personal medications. Note: Ladies, don’t forget to pack a separate container (a coffee can or plastic baby wipe box) with feminine hygiene items.
Jewelry box – Keep your sentimental jewelry items safe. Wearing a wedding ring while on the run could lead to problems. Any blow to the hand could cause your fingers to swell.
Gaming kit – Pack with a pack of cards, dice, Yahtzee scorecards, a small pencil, and any other small game items you can think of to entertain yourself.
Soap holder –Soap will be at a premium during the Z-poc. Don’t waste it! Store your used soap in a tin to keep it clean.
Don’t Leave Home Without it
Pill organizers aren’t just for keeping track of your weekly medication needs. Grab a couple extras to add to your go bag.
Spice rack –Cooking in the wild will likely lend to a lot of bland, boring meals. But not if you take along a miniature spice rack packed with your favorites. Be sure to label each compartment. You wouldn’t want to confuse paprika with cayenne pepper.
Seeds – Who knows how long we’ll have to fend for ourselves without the aid of grocery stores or farmer’s markets? Pack some easy-to-grow vegetable and fruit seeds in your go bag. Once you find a place to settle down for a little while, plant a small garden. Check your area for what produce items grow the fastest and easiest.
Old t-shirts
When you pack your kitchen supplies, toss in a few old or over-sized t-shirts. They have many possible uses, a few of which we’ve included below:
Rags – Cut the shirts into smaller pieces to use for wash cloths, dish washing cloths, and clean-up rags.
Bandages – Cut shirts into long strips, about 2-3 inches wide. Boil them in water, with a tablespoon (or more, depending on the quality of the water) of bleach and hang to dry somewhere they won’t get dirty. Makes great compression bandages to slow bleeding. Also can be used as a wrap to brace sprained joints.
Small hanging bags – With a minimal amount of sewing, which can be done by hand, you can turn a t-shirt into a bag.
Needed:
A large t-shirt
Scissors
Needle and thread
Straight pins
Felt or permanent marker
Lay the shirt out on a flat surface. Using the side of the shirt as the bottom edge of the bag-to-be, trace out the shape of a purse, with a handle on the top. Pin both sides of the t-shirt together with straight pins. Cut out the bag, leaving the bottom of the bag intact (don’t cut down the side of the shirt, it provide a solid bottom for your bag). Stitch the sides of the bag closed. Leave the top open. Cut out D-shapes to create the handles. Note: if you wish to use the bag to store fruits or vegetables, or to use as a hanging sack to dry dishes, cut tiny holes in the solid sides of the bag—not too many, just enough to allow airflow.

 Just over half of the land in Wyoming is dedicated to farmland.
 Only 9% of Nevada is used as farmland.
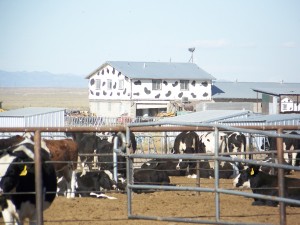 22% of Utah is used as farmland.
 An overwhelming portion of Nebraska is utilized as farmland, approximately 93% of the state.
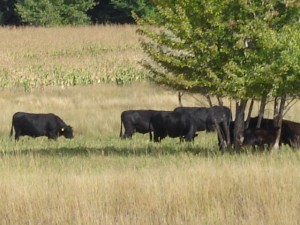 Just under half of the land in Colorado is used as farmland.
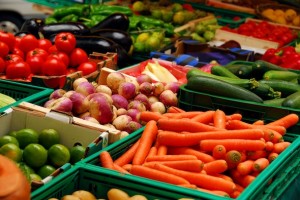 Approximately 36% of the state is farmland.
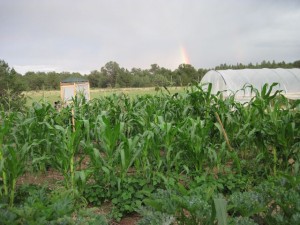 Over half of the state, about 58%, is dedicated to farmland.
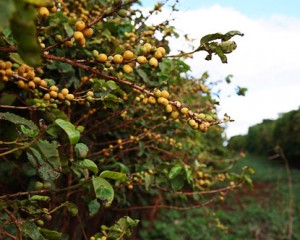 Just about 32% of the island state is farmland.
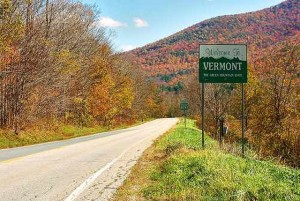
 Only 7% of the land in Maine is used for farmland.
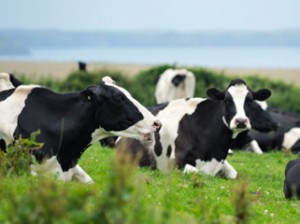


 Pick fruit with gloves and tongs. You don’t want to prick yourself with those needles! There’s a reason it’s called Prickly Pear.
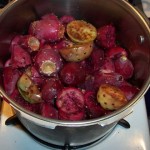 Place them in a pot. Cover with water and boil until tender (about 1 hour). Cut them in half after cooking, as they will mash easier. Drain and mash with a potato masher. Strain with double thickness cheesecloth (juice should be clear, no needles, etc.). Put pulp in garbage, not disposal (if indoors).